To clean gardening shears, remove loose dirt and plant bits, scrub the blades with warm water and mild dish soap, remove sap with rubbing alcohol or a suitable cleaner, sanitize when needed, dry every metal part, and apply a thin coat of tool oil.
Gardening shears work hard in American yards. They trim rose bushes, cut back perennials, shape shrubs, and remove dead stems from vegetable beds. After a few jobs, sticky sap, wet leaves, and bits of soil can cling to the blades. A quick clean helps keep the tool ready for its next cut.
The best cleaning method depends on what is on the blades. Dirt needs a scrub, sticky sap needs a suitable solvent, and possible plant disease calls for careful sanitation. Rust needs separate care, while a dull edge may need sharpening. This guide explains how to clean gardening shears at home, what supplies to use, and how to avoid common mistakes.
Source: thegardenersfriend.com
Why You Should Clean Gardening Shears
Clean gardening shears are easier to use and maintain. Sap can make the blades sticky, while dirt and plant bits can build up around the cutting edge and pivot joint. This grime may cause rough movement and make the tool harder to close. Regular cleaning helps you spot wear, rust, and loose parts before they become bigger problems.
Cleaning also matters for plant health. Some plant diseases can spread on contaminated pruning tools. If you trim a diseased branch and then cut a healthy plant, dirty blades may carry germs from one cut to the next. Cleaning removes visible debris, while an appropriate disinfectant or sanitizer helps reduce the risk of spreading certain plant pathogens.
In the United States, gardens face different challenges across the seasons. Spring pruning may leave fresh sap on the blades, while fall cleanup can coat them with dry plant matter and soil. Humid weather and wet storage can also raise the risk of rust on carbon steel. A short cleaning routine after use helps address these problems before residue hardens.
Source: i.pinimg.com
Cleaner cuts
Clean blades help the cutting edges meet as intended, provided the shears are also sharp and properly adjusted.
Better tool movement
Removing grime around the pivot can help the blades open and close with less resistance.
Lower disease transfer risk
Cleaning followed by suitable sanitation can reduce the chance of carrying plant pathogens between cuts.
Longer service life
Drying and oiling metal parts helps limit corrosion and protects moving parts from moisture.
What You Need to Clean Gardening Shears
Gather your supplies before you start. A few common household items are enough for routine cleaning, although thick sap or heavy rust may call for a special cleaner or rust remover. Check the tool manual first if your shears have a nonstick coating, special finish, or parts that should not get wet.
Set up a stable work area with good light. Keep the shears closed when possible, and place them on a firm surface so they cannot slide. If the design allows the blades to open freely, secure them in a position that gives you safe access without putting your fingers near the cutting edge.
Source: onevantool.com
Warm water and mild dish soap
Use these for ordinary dirt, plant residue, and grime that water can loosen.
Soft cloth or sponge
Wipe the blades without scratching their finish or spreading dirt over clean areas.
Nylon brush or old toothbrush
Reach around the pivot, blade base, and small gaps where plant debris collects.
Rubbing alcohol or a suitable sap remover
Use a compatible product for sticky sap, following the label and tool manufacturer’s guidance.
Plant-tool disinfectant
Choose a product labeled for the intended sanitation use, and follow its dilution and contact-time directions.
Dry cloth and tool oil
Dry all metal surfaces and apply a thin protective film after cleaning.
Protective gloves and eye protection
Use these when handling sharp edges, chemical cleaners, disinfectants, or rust removers.
Can You Use Household Cleaning Products?
Mild dish soap is suitable for routine washing, but it does not replace a plant-pathogen disinfectant. Rubbing alcohol may help remove sap and can disinfect some surfaces when used correctly, but its effectiveness depends on the organism, concentration, and contact time. Do not assume that every household cleaner will kill every plant pathogen.
Avoid mixing cleaning chemicals. Never combine bleach with ammonia, acids, vinegar, or other cleaners, as dangerous gases or reactions may result. Use one product at a time, follow its label, and rinse or dry the tool as directed before applying oil.
Use compatible products
Check whether the cleaner can be used on the blade metal, coating, and handle material.
Follow label directions
Correct dilution and contact time matter when a product is intended to disinfect.
How to Clean Gardening Shears Step by Step
For most hand pruning shears, the basic process is simple: remove loose debris, wash the tool, treat sticky residue, rinse if needed, dry it well, and protect the metal. Clean the shears before sharpening them or putting them away. If the blades are badly damaged or the pivot is unsafe, stop and repair or replace the affected parts before use.
The steps below suit many bypass and anvil pruning shears. Hedge shears and long-handled loppers use similar cleaning principles, but their size and design may require a different setup. Always follow the tool maker’s instructions for disassembly and maintenance.
Source: i.pinimg.com
Step 1: Close and inspect the shears
Engage the safety lock if fitted. Look for cracked handles, loose bolts, bent blades, deep rust, or a damaged cutting edge before cleaning.
Step 2: Brush away loose debris
Use a dry cloth or nylon brush to remove leaves, soil, and plant fibers. Work away from the sharp edge rather than dragging your fingers along it.
Step 3: Wash the blades
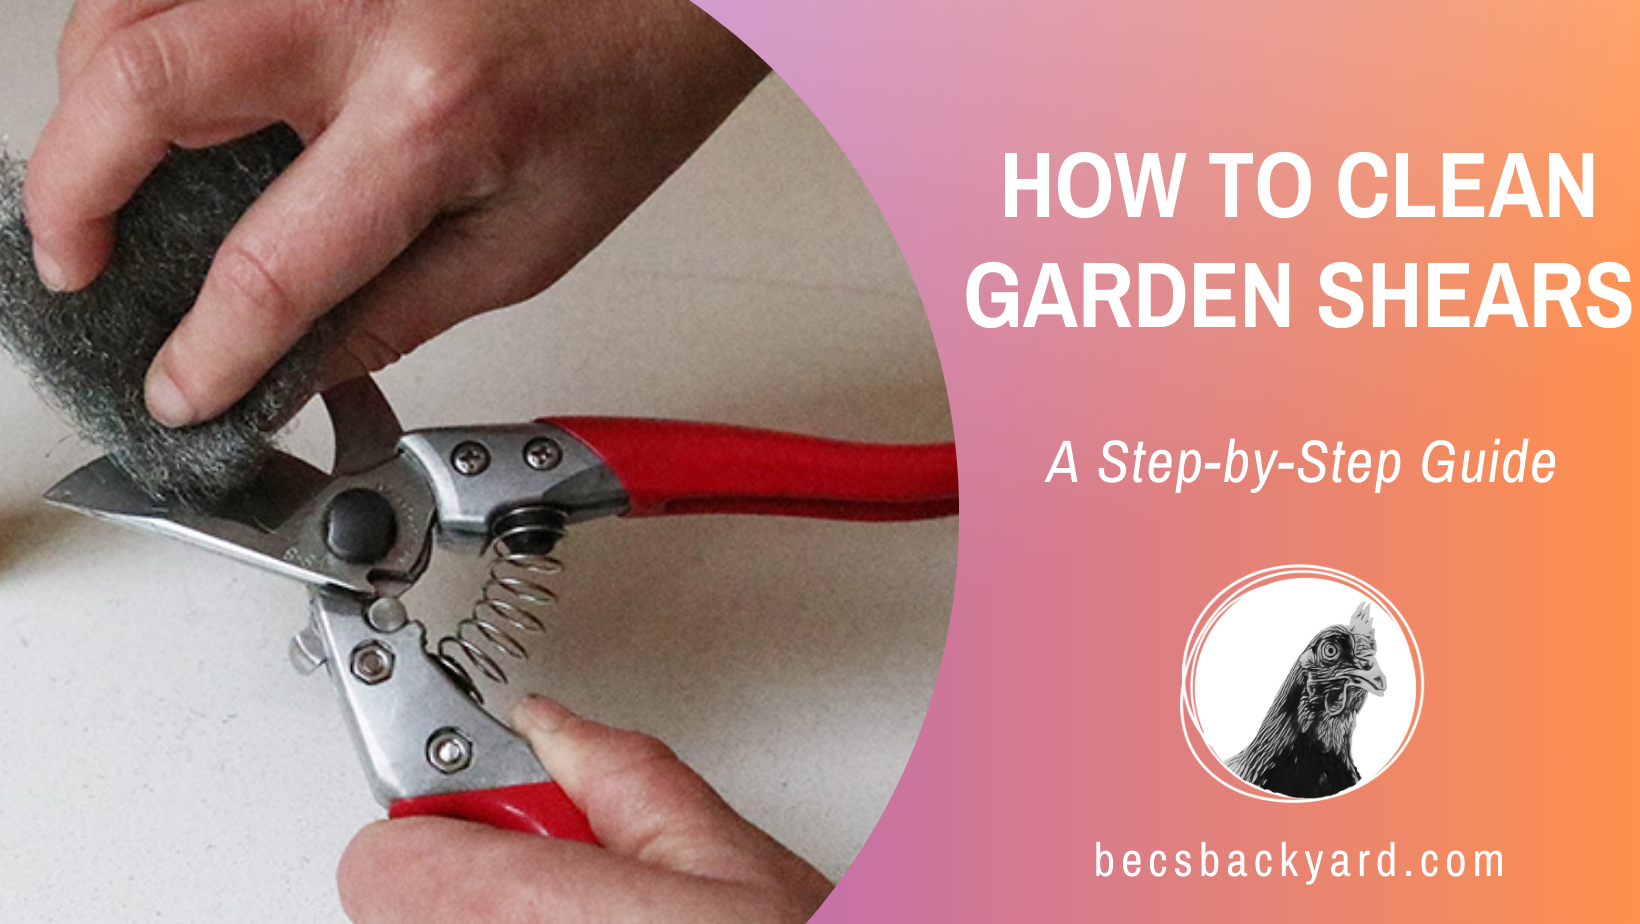
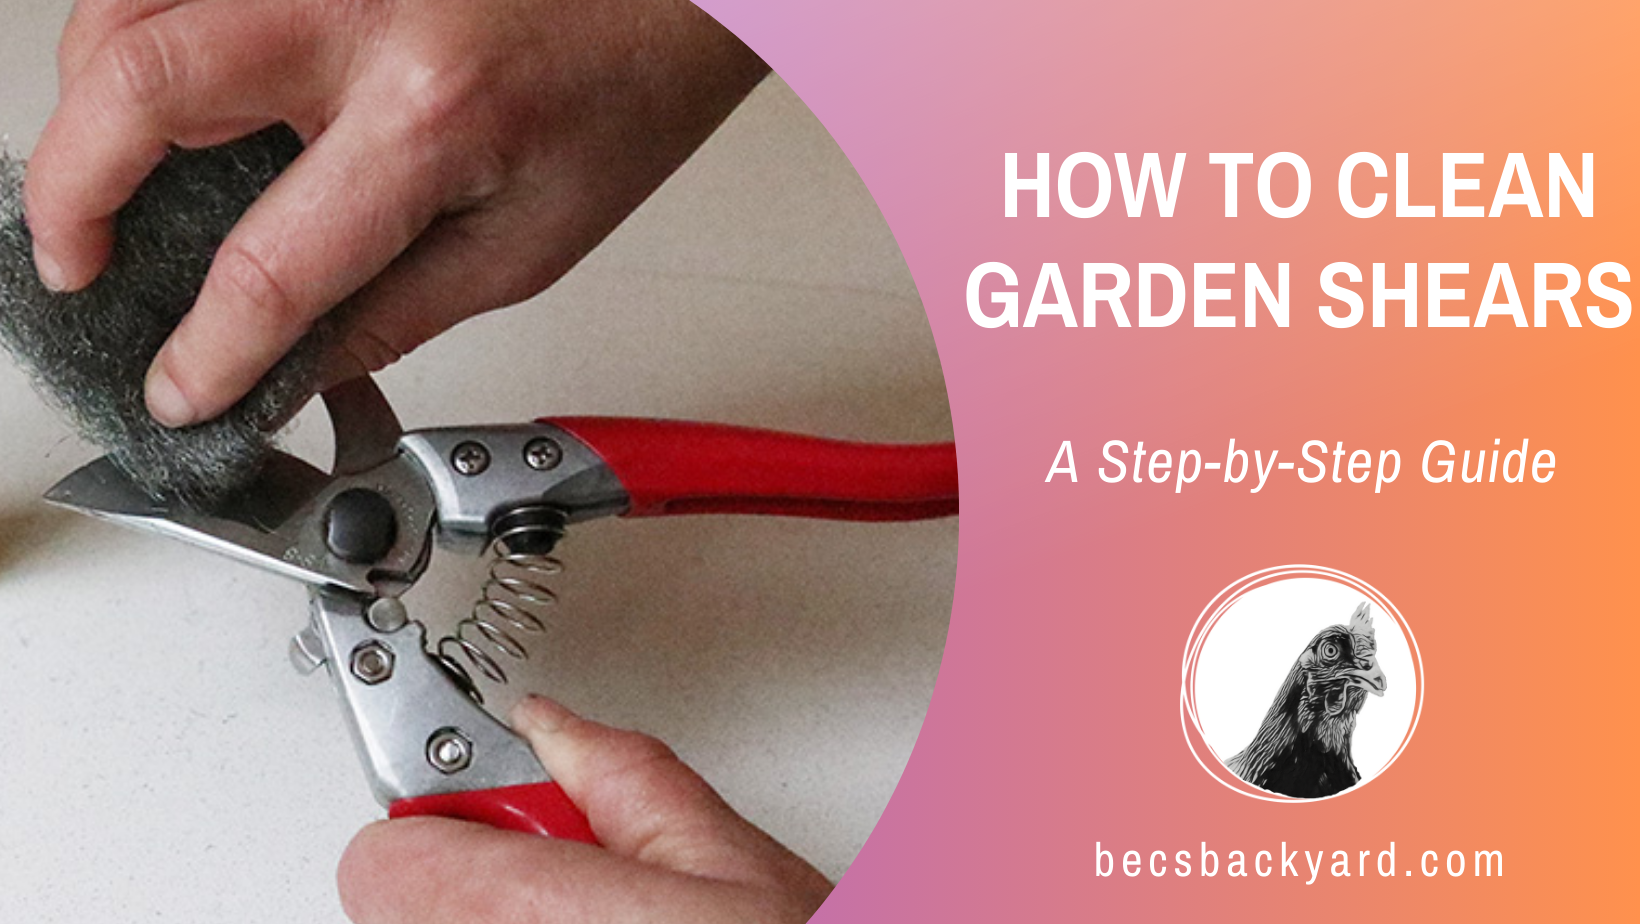
Dampen a cloth or sponge with warm water and mild dish soap. Wipe both sides of the blades and clean around the pivot with a soft brush.
Step 4: Remove stubborn grime
Use a nylon brush for stuck-on dirt. If sap remains, apply a compatible sap remover or rubbing alcohol to a cloth and wipe the affected area. Keep solvents away from flames and use them with suitable ventilation.
Step 5: Rinse when needed
Remove soap and cleaner residue according to the product label. Avoid soaking the whole tool or directing water into a sealed or delicate pivot assembly.
Step 6: Sanitize when appropriate
If you have pruned a plant with suspected or confirmed disease, use a suitable plant-tool disinfectant after removing visible dirt. Follow the product’s contact time and any required rinse instructions.
Step 7: Dry every metal surface
Wipe the blades, pivot area, and exposed metal with a clean cloth. Open and close the tool carefully to check for moisture trapped around moving parts, then dry those areas.
Step 8: Apply a thin coat of oil
Place a small amount of suitable tool oil on the metal surfaces and pivot. Wipe away excess oil so the blades are protected without becoming greasy.
Step 9: Check the action and store safely
Open and close the shears several times while keeping your hands clear of the blades. Confirm that the pivot moves smoothly and the lock works before storing the tool in a dry place.
How to Clean Around the Pivot Joint
The pivot joint is the area where the blades meet and rotate. Sap, dust, and small plant fibers can collect there and make the tool feel stiff. Use a soft brush and a lightly damp cloth to remove visible grime from the joint, then dry it well.
Do not loosen the pivot bolt unless adjustment or disassembly is needed and the manufacturer permits it. Some shears use a special bolt, washer, or locking nut. If you take the tool apart without tracking the parts, you may have trouble restoring the correct blade alignment.
If the joint feels stiff
Clean away debris, dry the area, and apply a small amount of suitable lubricant to the pivot.
If the blades wobble
Check the pivot fastener and follow the manual for adjustment. Replace worn parts if tightening does not solve the problem.
How to Tell Whether the Shears Are Clean
The blades should have no visible dirt, sticky sap, or plant fibers. The pivot should move without gritty resistance, and the metal should be dry before you apply oil. If the tool was used on a diseased plant, a clean appearance alone does not prove that the blades are free of plant pathogens.
Test the shears on a suitable small stem only after checking that the tool is sound and safe. A clean, sharp pair should make a neat cut within its rated capacity. If the stem is crushed or the blades snag, the edge, alignment, or pivot may need attention.
Visible result
No loose dirt, sap, or stuck plant material remains on the blades.
Movement result
The blades open and close smoothly without unusual grinding or looseness.
Storage result
The metal is dry, lightly protected with oil, and secured with the safety lock.
How to Remove Sticky Sap From Gardening Shears
Sticky sap often needs more than soap and water. It can cling to the cutting edge and make the blades feel tacky, especially after pruning resinous shrubs, fruit trees, or other plants that leave a heavy residue. Remove the sap soon after use so it has less time to dry and harden.
First, wipe away loose plant matter. Put a small amount of rubbing alcohol or a tool-compatible sap remover on a cloth, then rub the affected metal until the residue lifts. Repeat with a clean section of the cloth as needed. Keep the solvent off surfaces that may be damaged by it, and follow all label warnings.
Once the sap is gone, wash the blades with mild soapy water if the cleaner instructions allow it. Rinse away residue when required and dry the shears fully. If you used a disinfectant before removing all visible sap, clean the blades and repeat the disinfection step because organic material can reduce the effectiveness of some products.
Source: i.pinimg.com
For fresh sap
Wipe it off promptly with a suitable cloth and compatible cleaner.
For hardened sap
Let the recommended cleaner work for the label’s stated time, then loosen residue with a soft brush or cloth.
For stubborn buildup
Repeat the process instead of scraping hard with a knife or rough abrasive that may damage the cutting edge.
Is Rubbing Alcohol Safe for Pruning Shears?
Rubbing alcohol can help dissolve some sticky plant residues and may be useful for sanitation when the concentration and method are suitable for the target organism. Check the shear manufacturer’s guidance before using it on coated blades, painted handles, rubber grips, or plastic components.
Alcohol is flammable. Keep it away from sparks, cigarettes, flames, and hot surfaces. Use it in a well-ventilated place, keep it off your skin and eyes, and allow any residue to evaporate before returning the tool to storage.
Use a cloth rather than pouring
Apply a small amount to the affected area to limit unnecessary exposure and prevent liquid from pooling in the pivot.
Do not treat sap removal as complete sanitation
Follow an appropriate plant-health protocol when disease may be present.
How to Sanitize Gardening Shears Between Plants
Sanitize pruning shears when you need to lower the risk of spreading plant disease. This is especially useful when pruning plants with suspicious spots, cankers, wilting, or other signs of infection. Some pathogens can move on contaminated tools, although the correct treatment depends on the organism and the product used.
Start by removing sap, soil, and plant tissue from the blades. Visible organic matter can interfere with many disinfectants, so do not skip the cleaning step. Apply a product intended for the task and follow its exact label directions for concentration, contact time, rinsing, and personal protection.
There is no single treatment that should be assumed to control every plant pathogen. A method that works for one type of organism may not work for another. If a plant disease is severe or spreading, consult a local Cooperative Extension office or a qualified plant-health professional for guidance on the disease and the best sanitation method.
Source: gardenguides.com
Clean first
Remove visible soil, sap, and plant matter before applying the disinfectant.
Use a suitable product
Choose a cleaner or disinfectant whose label supports the intended use, and follow all directions.
Respect contact time
Keep the blade surface wet for the stated period if the product requires it.
Protect the tool afterward
Rinse if directed, dry completely, and oil exposed metal to reduce corrosion.
Can You Use Bleach to Sanitize Garden Shears?
Some gardeners use diluted bleach solutions for tool sanitation, but bleach can corrode metal and damage finishes. Its effectiveness also depends on the target pathogen, solution strength, contact time, and the presence of organic matter. Do not use a random dilution or assume that a brief wipe is enough.
If a plant-health recommendation calls for bleach, follow the specified dilution and handling directions, prepare only what is needed, and never mix bleach with other cleaners. Rinse the tool if the guidance requires it, then dry it thoroughly and protect the metal. A compatible labeled product may be easier on the tool, depending on the task.
Avoid prolonged exposure
Do not leave steel blades soaking in bleach unless the specific instructions explicitly call for that method.
Do not mix chemicals
Never combine bleach with vinegar, ammonia, acids, alcohol, or other cleaning products.
How to Remove Rust From Gardening Shears
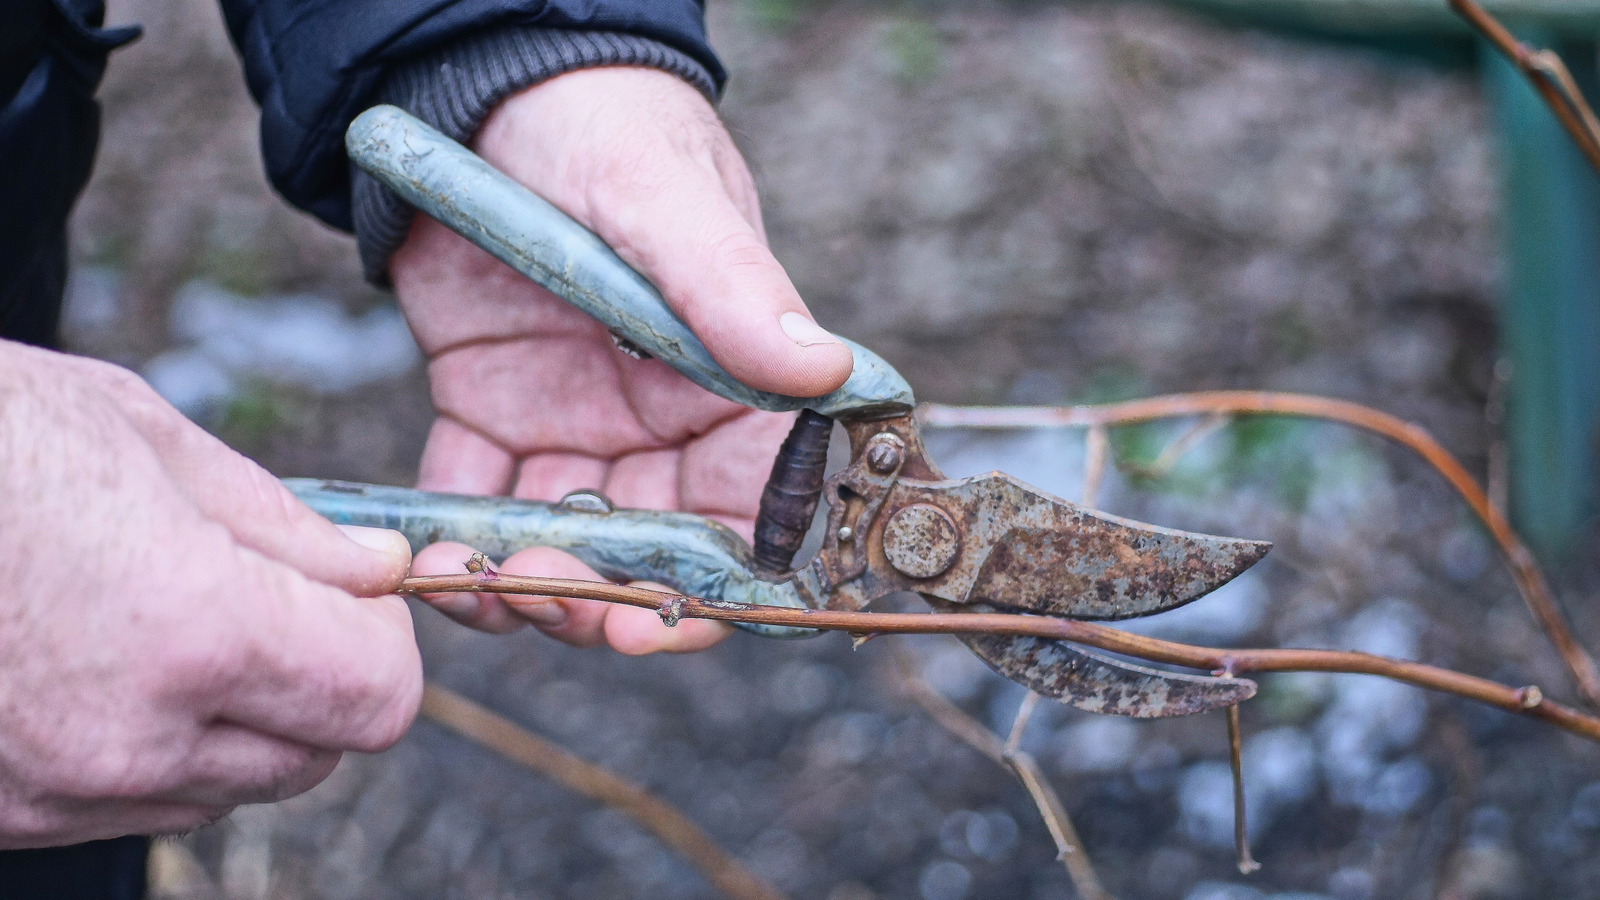
Small surface rust spots may be removable, but deep corrosion can weaken a blade or damage its cutting edge. Inspect the tool first. If the metal is badly pitted, cracked, bent, or thin near the edge, replacement may be safer than aggressive cleaning.
For light rust, begin with a dry cloth and a gentle nylon brush. If the rust remains, use a rust remover or cleaning method approved for the blade material. A fine abrasive may work on some uncoated steel blades, but rubbing directly on the cutting edge can change its shape or dull it. Avoid harsh abrasion on coated blades and use eye protection when working with rust or cleaning products.
After rust removal, wipe or rinse the tool as the product label directs. Dry every surface and apply a thin film of suitable oil. Check the pivot and cutting edge before using the shears again. Rust can return if the tool is stored damp or exposed to moisture for long periods.
Source: gardenguides.com
Light orange surface marks
Try gentle cleaning and a compatible rust treatment before using an abrasive.
Rough, pitted metal
Inspect the cutting edge closely because pits can affect cutting quality and may be difficult to remove safely.
Rust around the pivot
Clean accessible areas, dry the joint, and lubricate it. Seek repair help if the joint remains stiff or unstable.
Deep damage
Replace the affected blade or tool if corrosion has compromised strength or safe operation.
Does Vinegar Remove Rust From Garden Shears?
Vinegar can react with some rust, but soaking steel shears may also expose the metal and pivot to corrosive moisture. It may damage coatings or finishes, and the result depends on the amount of rust and the tool material. It is not the best default choice for every pair of shears.
A rust remover approved for the blade material offers clearer directions for use. Whichever method you choose, avoid prolonged wet exposure, follow the product instructions, dry the shears fully, and apply protective oil. Do not mix vinegar with bleach or other cleaners.
For light rust
Use a gentle, compatible method and inspect the blade as you work.
For heavy rust
Assess the tool’s condition before cleaning, since corrosion may have damaged the edge or joint.
How Often Should You Clean Gardening Shears?
Clean your gardening shears after each use when practical, especially if the blades are sticky, wet, or dirty. If you prune a plant that may have a contagious disease, clean and sanitize the blades before moving to another plant. A quick wipe during routine yard work can prevent a bigger cleaning job later.
The right schedule also depends on the type of work. Cutting clean, dry stems may leave little residue, while pruning resinous branches can coat the blades quickly. Wet conditions, frequent use, and storage in an unheated shed may call for more frequent checks and drying.
Source: creeklinehouse.com
After every pruning session
Remove plant debris and sap, wipe the blades clean, and dry the tool before storage.
Between plants with suspected disease
Clean and sanitize the shears using a method appropriate for the likely pathogen.
During long gardening sessions
Inspect the blades often and clean away heavy sap or debris before it builds up.
Before seasonal storage
Give the shears a full cleaning, inspect for rust and wear, oil the metal, and store them in a dry place.
A Simple Gardening Shears Maintenance Schedule
A short routine makes tool care easier to keep up with. You do not need to take apart the shears after every cut, and unnecessary disassembly can create new problems. Focus on visible dirt, smooth movement, a sound cutting edge, and dry storage.
After use
Brush away debris, clean sap, dry the blades, and lock the tool.
Clean the pivot, inspect for wear, and apply a small amount of suitable lubricant.
When cuts become rough
Check blade cleanliness, sharpness, alignment, and the type of branch being cut.
Before winter or extended storage
Remove residue, inspect the tool, protect the metal with oil, and store it away from damp conditions.
Common Cleaning Mistakes to Avoid
Many cleaning problems come from rushing the final steps. A blade may look clean but still hold moisture near the pivot, where rust can start. Too much force can damage a cutting edge, and an unsuitable chemical may harm a coating or grip. Slow down enough to inspect the tool before putting it away.
Keep your hands clear of the blades throughout the process. Gardening shears can close suddenly if the spring releases or the tool slips. If you need to remove a blade or spring, use the correct method from the manual and do not continue if a component is under tension or you cannot secure it safely.
Source: becsbackyard.com
Leaving shears wet
Moisture can lead to corrosion, particularly on carbon steel. Dry the blades and pivot before storage.
Using a rough metal file on the cutting edge
An unsuitable abrasive can alter the edge angle. Use a sharpening method designed for the tool.
Skipping cleaning before disinfection
Sap and plant debris may reduce the effectiveness of some disinfectants.
Mixing cleaning chemicals
Chemical combinations can create toxic gases or other hazards. Use one product at a time.
Oiling dirty blades
Oil can trap residue and make later cleaning harder. Remove dirt first, then apply a thin protective coat.
Forcing a stuck pivot
Remove debris and inspect the joint instead of applying excessive force or bending the handles.
What If the Shears Still Feel Stiff After Cleaning?
If the blades remain stiff, check for residue around the pivot, rust, a loose or overtightened fastener, and damaged moving parts. Clean the accessible joint and dry it before adding a small amount of suitable lubricant. Open and close the shears carefully to see whether the action improves.
If the blades bind, scrape, or fail to line up, the problem may be mechanical rather than dirt. Follow the manufacturer’s adjustment instructions or seek repair. Do not use the tool if a cracked handle, loose blade, broken spring, or faulty safety lock makes it unsafe.
Stiff but otherwise sound
Clean the pivot, dry it, lubricate it, and check the manufacturer’s adjustment guidance.
Loose, bent, or damaged parts
Stop using the shears until the parts are repaired or replaced.
How to Keep Gardening Shears Clean in Storage
Good storage keeps clean shears ready for the next job. After cleaning, confirm that the blades are fully dry and lightly oiled where appropriate. Close the blades, engage the safety lock, and place the tool in a dry area where children and pets cannot reach it.
Avoid leaving shears on damp soil, in wet grass, or at the bottom of a bucket with other tools. Condensation in a shed can also affect exposed steel. If your storage area is humid, check the shears from time to time and wipe away any moisture before it causes rust.
Keep the tool separate from fertilizers, corrosive chemicals, and products that could spill onto the metal. If the shears come with a blade cover, use it once the tool is clean and dry. A cover helps protect the edge and makes storage safer, but it should not trap moisture against the blades.
Source: thegardenersfriend.com
Choose a dry location
Use a tool rack, cabinet, or shelf away from direct rain and damp ground.
Lock the blades
Engage the safety catch or fit the blade cover before putting the tool away.
Keep tools separate
Avoid storing shears loose in a pile where the edge may hit other metal objects.
Inspect before the next use
Check the lock, handles, pivot, and blade condition before starting another pruning task.
Frequently Asked Questions
Q
Can I clean gardening shears with dish soap and water?
Yes. Mild dish soap and warm water work well for routine dirt and grime on many gardening shears. Use a cloth or soft brush, avoid soaking the whole tool, and follow the manufacturer’s guidance. Dry all metal parts fully and apply a thin coat of suitable tool oil before storage.
Q
How do I clean gardening shears without taking them apart?
Brush off loose debris, wipe the blades with a soapy cloth, and use a soft brush to reach around the pivot. Treat sticky sap with a compatible cleaner, then rinse if needed and dry the tool. Apply a small amount of lubricant to the pivot. Do not force the blades apart or loosen fasteners unless the manual allows it.
Q
What is the best way to sanitize pruning shears?
The best method depends on the plant pathogen and the product used. First remove dirt, sap, and plant tissue. Then use a suitable plant-tool disinfectant according to its label, including the correct concentration and contact time. When a serious plant disease is suspected, ask a local Cooperative Extension office for pathogen-specific guidance.
Q
Can I use WD-40 on gardening shears?
Some multipurpose sprays can help loosen grime or displace moisture, but they should not automatically replace a lubricant intended for tool pivots or a protective oil for long-term storage. Check the product label and the shear manufacturer’s instructions. Clean off residue as directed, dry the metal, and use a suitable tool oil when needed.
Q
How do I clean rusty gardening shears?
Start with a dry cloth and a gentle brush to remove loose rust. For remaining surface rust, use a rust remover approved for the blade material and follow its directions. Avoid damaging the cutting edge with aggressive abrasion. Dry the shears fully and apply protective oil. Replace or professionally repair tools with deep pitting, cracks, or weakened parts.
Q
Should I clean gardening shears after every use?
A quick clean after each pruning session is a good habit, especially when sap, wet plant matter, or soil is present. Always clean and use an appropriate sanitation method between plants when disease transfer is a concern. Dry and store the shears safely to reduce rust and keep the blades ready for their next use.
✦ Wrapping Up
Conclusion
Learning how to clean gardening shears takes only a few simple steps. Brush off loose debris, wash away grime, remove sticky sap with a suitable cleaner, sanitize when plant disease is a concern, and dry the blades well. A light coat of tool oil helps protect exposed metal and keeps the pivot moving smoothly.
Make cleaning part of your regular yard routine rather than waiting until the blades are covered in residue. Check the tool for rust, loose parts, and dull edges while you work. If the shears are damaged or unsafe, repair or replace them before pruning again.
💡 Key Takeaway
After your next pruning session, spend a few minutes cleaning, drying, and oiling your gardening shears. If you worked on a plant with suspected disease, use a suitable sanitation method before moving to another plant.