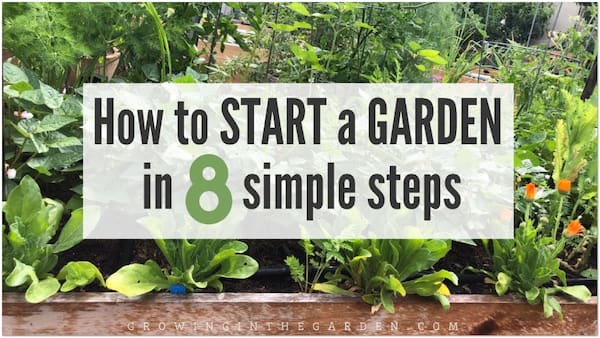
To start a garden, choose a sunny spot, check the soil, pick plants that suit your local climate, prepare the ground, plant at the right time, and water as needed. Begin with a small space and care for it a little at a time.
Starting a garden in the United States can be simple, even if you have never grown a plant before. You might have a sunny backyard in Texas, a small patio in New York, or a narrow side yard in California. The best plan depends on your space, local weather, soil, and the plants you want to grow.
You do not need a large yard or a shed full of tools. A small garden bed, a few pots, or a patch of ground can be enough to get started. The key is to match each plant to the place where it will grow, then give it suitable soil, water, light, and room.
Start by choosing what you want your garden to do. A vegetable garden provides food, a flower garden adds color, and an herb garden gives you fresh leaves for cooking. You can also mix these plants if the space, light, and care needs fit together.
Your first garden should be easy to manage. A small plot lets you learn how often plants need water, which weeds grow in your yard, and how much time garden care takes. You can add more plants after you know what works.
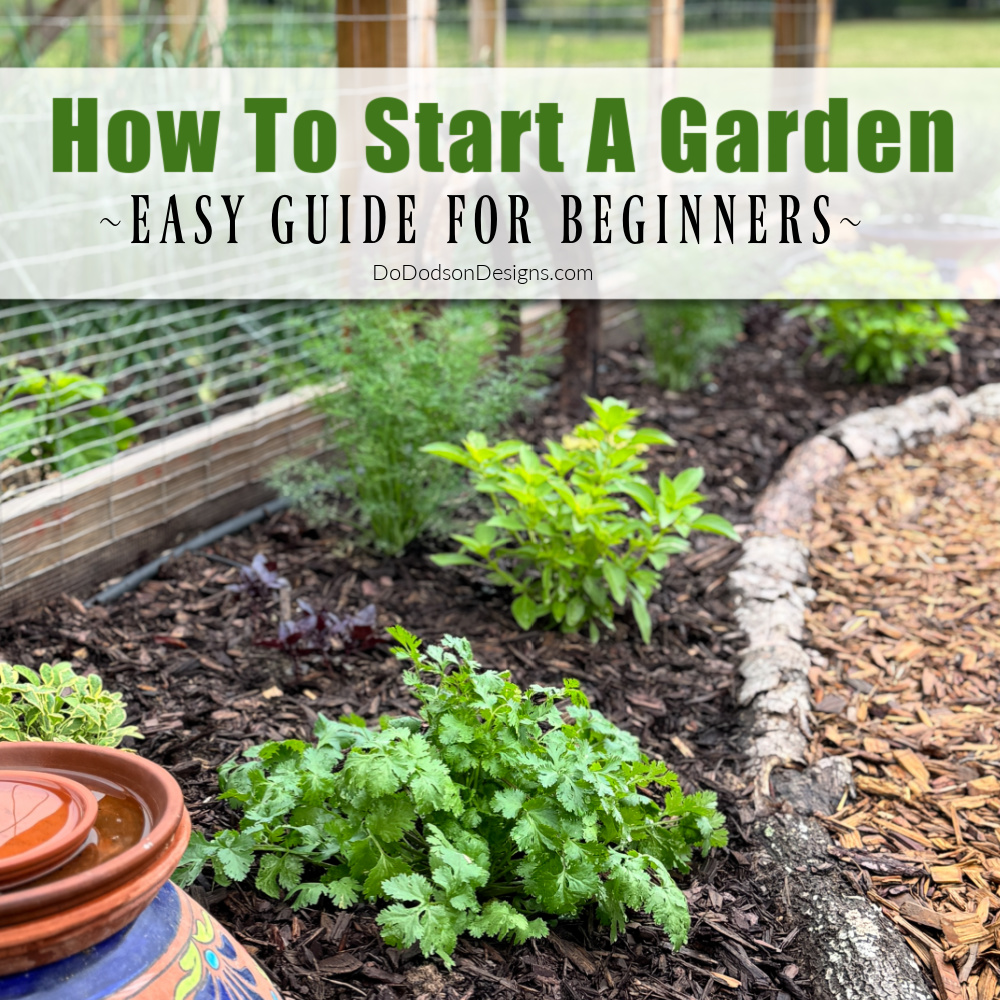
Source: verification.nphcda.gov.ng
Vegetable garden
Grow crops such as lettuce, radishes, beans, tomatoes, or peppers when the season and sunlight suit them.
Flower garden
Use annual flowers for color in one growing season or suitable perennials that return over several years.
Herb garden
Grow herbs such as basil, parsley, chives, or thyme in a bed or containers, based on each herb’s light and water needs.
Container garden
Use pots with drainage holes if you have a balcony, patio, paved yard, or limited ground space.
Set a Realistic Garden Size
A small bed or a few containers are often easier to manage than a large plot. Choose a size you can reach without stepping on the soil. Make sure you can carry water to the plants and reach the center of each bed from the sides.
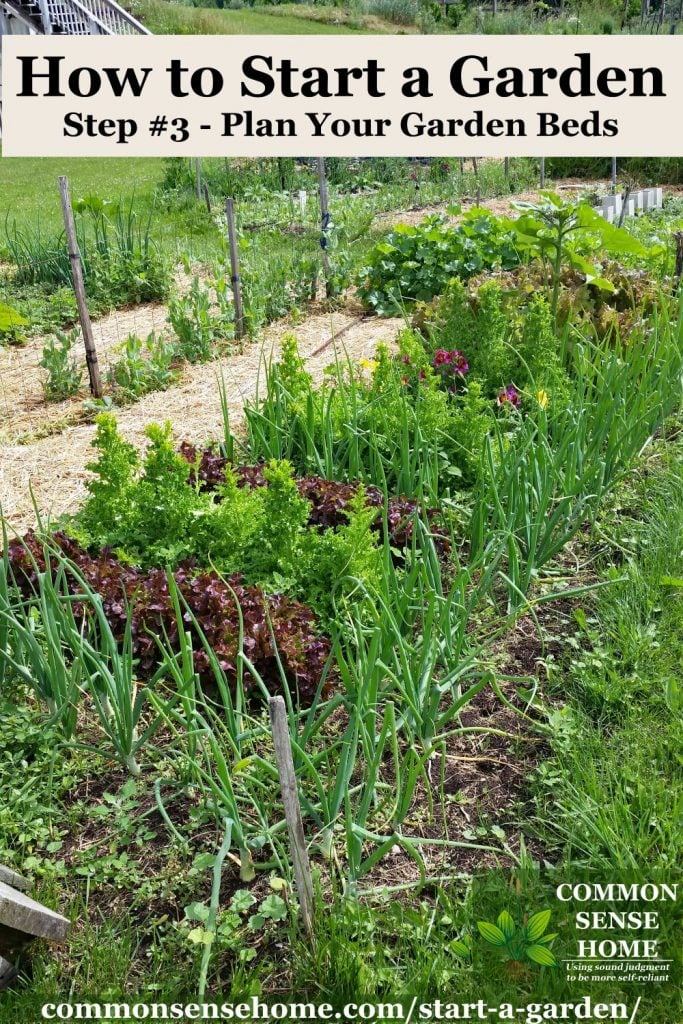
Before you dig, sketch the area on paper. Mark paths, beds, containers, fences, trees, and nearby water sources. This simple plan can prevent crowded plants and hard-to-reach corners.
For a tiny space
Start with two or three pots or one compact raised bed.
For a backyard
Set aside a manageable patch with clear walking space around it.
For a family garden
Choose crops or flowers that match the time you can spend on care.
2. Choose the Right Place for Your Garden
The right site makes garden care easier from the start. Look for a place with suitable sunlight, good drainage, access to water, and enough room for plants to grow. A spot that looks open in early spring may become shaded when nearby trees grow full leaves.
Watch the site at different times of day before you plant. Note where shadows fall, where water collects after rain, and whether a fence or building blocks the light. These details can help you avoid plants that struggle because their growing needs do not match the site.
Source: backyardcorner.com
Sunlight
Many fruiting vegetables need around six to eight hours of direct sun each day. Leafy crops and some shade plants can grow with less, depending on the variety.
Drainage
Avoid places where water stays for long periods unless you are growing plants suited to wet conditions.
Water access
Choose a location where a hose or watering can can reach without trouble.
Room to grow
Allow space for mature leaves, roots, and paths. Follow the spacing on seed packets or plant labels.
How Much Sun Does a Garden Need?
Sunlight needs depend on what you grow. Tomatoes, peppers, and many flowering plants produce best in a sunny location. Lettuce and some leafy greens can handle partial shade, especially where afternoon heat is strong.
If your yard has deep shade for most of the day, do not force sun-loving crops to grow there. Try shade-tolerant plants or use containers in a brighter location. A movable pot can make it easier to find the best spot.
Full sun
Use for plants whose labels call for a sunny site, often six or more hours of direct light.
Partial shade
Use for plants that can grow with fewer hours of sun or some protection from strong afternoon light.
Check for Underground Utilities Before Digging
Before digging a new bed in the United States, contact 811 or use your state’s official 811 service to learn how to request utility marking. Buried electric lines, gas pipes, water lines, and communication cables may run through a yard. Wait for the required markings and follow the instructions before you dig.
Near buildings
Keep the bed away from foundations and places where irrigation could direct water toward the house.
Near trees
Avoid cutting large roots. Use containers or a different site if tree roots fill the area.
3. Test and Prepare the Soil
Healthy soil gives roots air, water, and access to nutrients. Before adding fertilizer or large amounts of compost, learn what your soil needs. Soil can look dark and rich yet still have a pH or nutrient problem that affects plant growth.
A soil test from a local cooperative extension service or a reliable soil testing laboratory can help guide changes. In the United States, your county’s Cooperative Extension office may explain how to collect a sample and where to send it. The right test can vary by crop and location.
Source: commonsensehome.com
Remove weeds
Pull or dig out existing weeds where practical, removing as much of the root system as possible.
Check soil texture
Notice whether the soil feels sandy, sticky, or crumbly. Texture affects drainage and water retention.
Add organic matter when needed
Finished compost can improve many garden soils, but use it in a way that fits the test results and crop.
Avoid wet soil
Do not dig or till soil when it is very wet. Working it in that state can damage its structure and leave hard clumps.
How to Improve Garden Soil
If the soil is compacted, improve the bed when it is dry enough to crumble rather than smear. Loosen the planting area with a suitable hand tool, and avoid unnecessary digging that brings up large amounts of subsoil. For a new bed, a thin layer of suitable finished compost may help improve soil structure.
Do not assume that more fertilizer means faster growth. Too much fertilizer can harm roots, cause excess leafy growth, or lead to nutrient runoff. Use test results, product directions, and the needs of your chosen plants to guide any additions.
For heavy clay
Improve soil structure with suitable organic matter over time and avoid working it when wet. A raised bed can help where drainage remains poor.
For sandy soil
Organic matter may help the soil hold water and nutrients for longer.
For containers
Use a suitable potting mix rather than dense garden soil, which may drain poorly in a pot.
Should You Build a Raised Bed?
A raised bed can make planting and harvesting easier, especially where the ground is compacted or drains poorly. It also gives you more control over the growing mix. However, raised beds can dry out faster than nearby ground, so they may need closer attention during hot weather.
Choose untreated or appropriately rated materials for the intended use. If you use reclaimed wood, find out what it was treated with before using it around food crops. Fill the bed with a suitable growing mix and leave enough room to reach all plants without stepping on the soil.
Main benefit
A raised bed creates a defined planting area that can be easier to reach and manage.
Main trade-off
It costs more to set up than planting directly in the ground and may need more frequent watering.
4. Pick Plants That Suit Your Climate
Choose plants that can grow in your region and during your available growing season. A plant that thrives in a mild coastal area may struggle in a hot inland summer or a cold northern winter. Seed packets, plant labels, and local extension guides can help you make a suitable choice.
The USDA Plant Hardiness Zone Map is useful when choosing perennial plants because it groups locations by average annual extreme minimum winter temperature. It does not tell you everything about a plant’s needs. Summer heat, humidity, rainfall, soil, and frost dates also affect what grows well.
Source: sublimegardens.co.uk
For a vegetable garden
Choose crops based on your region’s frost dates, temperature range, and the time each crop needs to mature.
For a flower garden
Check mature size, light needs, bloom time, and whether the plant is annual or perennial.
For a low-care garden
Look for plants suited to your local conditions instead of trying to keep a poorly matched plant alive.
For wildlife
Consider native plants that support local pollinators and other wildlife, while checking whether a species is suitable for your site.
Seeds or Young Plants: Which Should You Use?
Seeds often cost less and provide more varieties to choose from. Some crops, including many beans, peas, carrots, and radishes, are commonly sown directly in the garden. Other crops may benefit from being started indoors or purchased as young plants, especially when the growing season is short.
Young plants can save time, but they need careful handling when moved into the garden. Check the roots and leaves before buying. Avoid plants with severe damage, signs of pests, or a dry, badly stressed appearance.
Choose seeds
When you want more variety, lower starting costs, or crops that grow well from direct sowing.
Choose transplants
When you want a head start or the crop benefits from an indoor start in your region.
Plan Around Local Planting Dates
Warm-season crops such as tomatoes and peppers can be damaged by frost. Cool-season crops such as peas and many leafy greens can often be planted earlier, though their timing depends on local conditions and the variety. Use local frost-date guidance as a planning aid, not a guarantee of the weather.
In hot parts of the South, gardeners may need to avoid the harshest summer heat for some crops and plan for a fall growing season. In colder areas, the short warm season may favor quick-maturing crops. Follow regional planting guides rather than using one national calendar for every garden.
Check the seed packet
Read the planting depth, spacing, germination conditions, and expected days to maturity.
Watch the forecast
Delay planting or protect suitable plants when frost, extreme heat, or severe weather threatens.
5. Gather the Basic Gardening Tools
You can begin gardening with a few basic tools. The right tools depend on the size of the garden and the work you plan to do. A container gardener may need little more than a watering can, hand trowel, and gloves, while a larger plot may call for a hoe or digging fork.
Buy tools for tasks you actually need to do. A sharp hand trowel helps with planting, while pruners are useful for cutting suitable stems and removing damaged growth. Keep tools clean, dry, and stored safely to reduce rust and help them last.
Source: thelandscapingzone.com
Hand trowel
Use it to make small planting holes, move potting mix, and transplant young plants.
Watering can or hose
Choose a way to water the root zone without washing soil away or damaging tender seedlings.
Garden gloves
Use gloves that fit well when handling rough plant material, soil, or tools.
Hand pruners
Use clean, sharp pruners for stems that are within the tool’s cutting capacity.
Hoe or weeding tool
Use it to control small weeds in suitable soil without damaging nearby crop roots.
Use Tools Safely
Read the instructions for each tool and use it only for its intended task. Wear sturdy footwear when digging, keep sharp edges pointed away from your body, and carry tools with their blades under control. Clean tools after working with diseased plants before using them elsewhere.
Protect your skin when working outdoors. Wash your hands after handling soil or compost, avoid touching your face with dirty gloves, and cover cuts. Store tools where children cannot reach sharp blades or heavy equipment.
Before use
Check handles, blades, and moving parts for damage or looseness.
After use
Remove soil and plant debris, dry metal parts, and store tools in a safe place.
6. Plant Seeds and Young Plants Correctly
Follow the planting instructions for each crop or flower. Seeds differ in how deeply they should be planted, and some need light to germinate. Planting every seed at the same depth can lead to poor germination or weak seedlings.
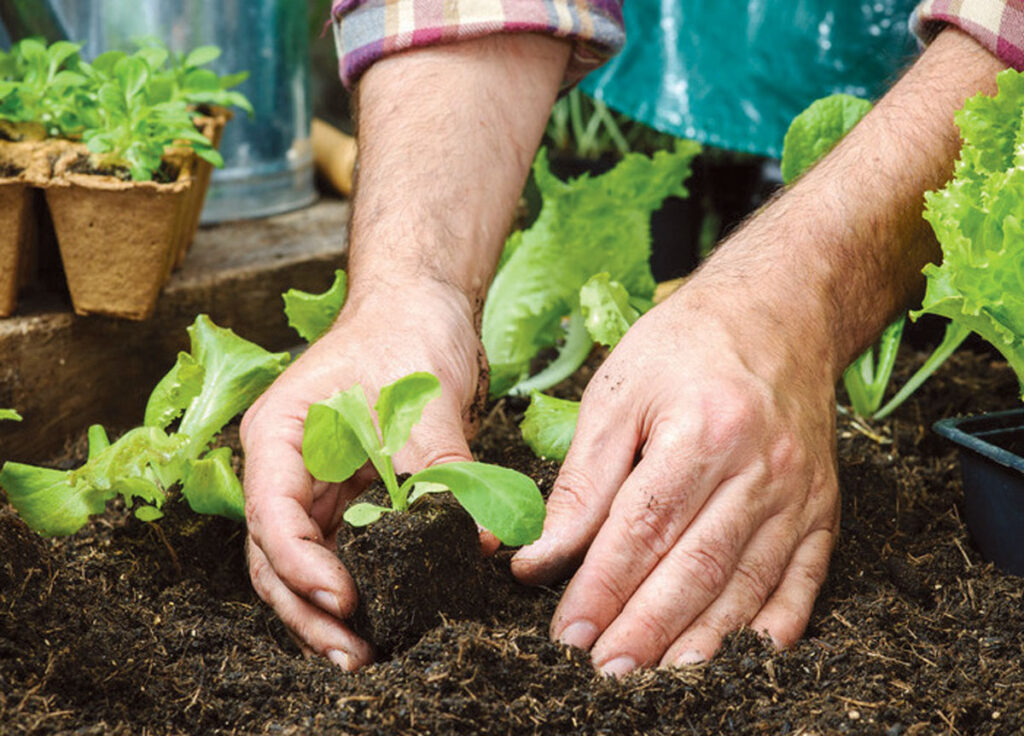
For young plants, water the root ball before planting if it is dry. Set each plant at the depth recommended for its species, firm the surrounding soil gently, and water it in. Leave enough space between plants for mature growth and airflow.
Source: anymp4.com
Read the label
Use the stated planting depth, spacing, and temperature guidance.
Mark the rows
Use labels or simple markers so you know what you planted and where it should emerge.
Water after planting
Moisten the root zone to help soil settle around seeds or roots without flooding the bed.
Protect tender plants
Use suitable temporary protection if local conditions threaten young plants, and remove or adjust it as needed.
Give Plants Enough Space
Crowded plants compete for light, water, and nutrients. Their leaves may also stay wet longer when airflow is poor, which can favor some plant diseases. The correct spacing depends on the mature size of the variety and the way you plan to grow it.
Do not judge spacing only by the size of a seedling at planting time. A small tomato plant can grow into a broad, tall plant, while a compact herb may need much less room. Follow the plant label and plan for its full size.
For direct-sown seeds
Sow at the recommended spacing, then thin seedlings if the instructions call for it.
For transplants
Leave room for mature leaves and access for watering, weeding, and harvesting.
Know What Successful Planting Looks Like
Seeds that have the right conditions should germinate within the time range listed on the packet, though temperature and moisture can affect timing. Transplants may look slightly droopy after moving, but they should begin to settle in when the roots receive suitable water and conditions.
If nothing emerges, check planting depth, soil moisture, temperature, and seed age before adding more seed. If transplants wilt, check whether the root ball is dry or waterlogged, and look for damage or sudden heat stress.
Signs of progress
Look for new leaves, firm stems, and steady growth suited to the plant.
Signs of trouble
Watch for persistent wilting, yellowing, rotting stems, or seedlings that fail to emerge beyond the expected period.
7. Water Your Garden the Right Way
Water the soil around the roots rather than relying on a quick spray over the leaves. The right amount and timing depend on plant type, soil, rainfall, container size, and weather. A new bed may need closer checks than an established planting with deep roots.
Check soil moisture before watering. Push a finger into the soil near a plant or use another suitable way to check the root zone. If the soil is still moist where the roots are growing, more water may not be needed. If it is dry, water slowly enough to soak the root area.
Water deeply when needed
Aim to wet the root zone instead of giving plants frequent, very shallow sprinkles.
Check containers often
Pots can dry faster than garden beds, especially in hot, windy weather.
Adjust for rain
Skip or reduce watering when rainfall has already kept the root zone moist.
Avoid waterlogged soil
Check drainage if soil stays soggy or roots begin to show signs of rot.
When Is the Best Time to Water?
Early morning is often a practical time to water because plants can take up moisture before the hottest part of the day. Watering at the base also helps keep leaves drier. If a plant is wilting from a dry root zone, give it needed water rather than waiting for a perfect time.
There is no single watering schedule that works for every garden. A hot spell, a sandy bed, a small pot, or a newly planted seedling can change how often water is needed. Let soil conditions and plant needs guide the decision.
In hot weather
Check moisture more often, especially in pots and newly planted beds.
In cool or wet weather
Reduce watering when the soil remains moist.
How to Spot Too Much or Too Little Water
Wilting can result from dry soil, waterlogged roots, heat, or transplant stress. Do not assume that every wilted plant needs more water. Check the soil first, then look for signs such as standing water, a sour smell, dry soil pulling away from a pot, or roots that appear dark and soft.
Possible underwatering
Dry soil, limp leaves, and a pot that feels unusually light may point to a lack of water.
Possible overwatering
Persistently wet soil, yellow leaves, and soft or damaged roots may point to excess moisture or poor drainage.
8. Keep Weeds and Pests Under Control
Regular checks help you find weeds, insects, and plant damage before they become harder to manage. Walk through the garden a few times each week and look under leaves, around new growth, and along the soil surface. Early action is often easier than trying to fix a large problem later.
Not every insect is harmful. Bees, lady beetles, lacewings, and other insects may help pollinate plants or feed on pests. Identify the problem before taking action, and avoid spraying plants just because you see an insect.
Pull weeds early
Remove small weeds before they produce seeds or compete heavily with garden plants.
Check leaf undersides
Look for eggs, clusters of insects, webbing, and early signs of damage.
Remove badly affected material
Where appropriate, remove diseased or heavily infested leaves and dispose of them according to local guidance.
Use pesticides carefully
Identify the pest, read the full label, and use only products approved for the plant and intended site.
Use an Integrated Approach to Pest Control
Integrated pest management starts with correct identification and prevention. Healthy plants, suitable spacing, regular checks, and removal of small pest populations can reduce the need for chemical treatment. When a problem persists, use a reliable identification guide or ask a local Cooperative Extension office for help.
If you use a pesticide, follow the label exactly, including protective equipment, application limits, and any restrictions for food crops or pollinators. Keep children and pets away as directed. Never mix products or increase a dose beyond the label instructions.
First step
Identify the pest and determine whether the damage is serious enough to require action.
Next step
Try suitable nonchemical controls, such as hand removal or physical barriers, when they fit the problem.
Last step
If treatment is needed, choose a labeled product for the target pest and plant.
9. Feed Plants and Add Mulch When Needed
Plants need nutrients, but the right feeding plan depends on the crop and soil. Some garden beds need little extra fertilizer, while heavy-feeding vegetables may need a planned nutrient supply. Use soil test results and crop guidance rather than applying fertilizer by habit.
Mulch can help limit weeds, reduce soil moisture loss, and protect the soil surface. Organic options include clean leaves, straw suitable for the crop, and other appropriate plant materials. Keep mulch from pressing against plant stems, and avoid materials that may contain weed seeds or unwanted chemicals.
Use fertilizer with care
Follow label rates and avoid applying more than the plants or soil need.
Spread mulch evenly
Use a suitable layer around plants while leaving a little space around stems and trunks.
Refresh organic mulch
Add more only when needed, and check that old layers have not become too thick.
Why Too Much Fertilizer Can Hurt
Excess fertilizer can damage roots, create imbalanced growth, or wash into nearby waterways. Strong leaf growth does not always mean a plant will produce more flowers or fruit. Apply only what is suitable for the plant, and keep fertilizer away from waterways and drains.
Follow the label
Measure the stated amount and observe any timing or watering instructions.
Store it safely
Keep fertilizer in its original container, away from children, pets, food, and moisture.
10. Maintain the Garden Through the Season
A garden needs steady care, but the work can be split into short tasks. Check soil moisture, pull small weeds, inspect leaves, and harvest ripe crops when you visit. Small, regular jobs are easier to manage than leaving everything until the garden becomes overgrown.
As plants grow, remove dead or damaged material when suitable, support tall crops, and make room for healthy growth. Some plants need pruning, while others should be left alone. Check the needs of each plant before cutting stems or removing leaves.
Check moisture
Feel the soil near roots and water when the plants and conditions call for it.
Inspect for damage
Look for new spots, holes, drooping, broken stems, and signs of pests.
Harvest at the right stage
Follow crop guidance for size and ripeness, and use clean tools when needed.
Record what happens
Write down planting dates, weather issues, harvests, and problems so you can plan better next season.
A Simple Weekly Garden Routine
A routine helps you keep up without spending hours in the garden every day. Change the schedule as the weather and plant needs change. A garden in a dry summer may need more frequent checks than one during a cool, rainy period.
At each visit
Check plants for wilting, pest damage, broken stems, and obvious soil problems.
Once or twice a week
Pull weeds, check supports, and review soil moisture across the bed.
When plants are ready
Harvest crops, remove spent flowers where useful, or collect seed only from plants suitable for that purpose.
At season’s end
Remove unhealthy plant debris, clean tools, and note what you want to change next year.
Keep a Garden Journal
A basic garden journal can be a notebook, calendar, or simple digital note. Record the plant variety, planting date, site, weather, watering changes, and any pest or disease problems. Add harvest notes if you grow food.
These records help you compare seasons without relying on memory alone. If one crop fails, note what happened and change one or two things next time. This makes it easier to learn whether the issue came from timing, light, water, soil, or a pest.
Write down dates
Record when seeds were sown, plants were moved, and crops were harvested.
Note problems
Describe visible symptoms and recent changes in weather, watering, or care.
11. Common Beginner Gardening Mistakes
Most beginner garden problems have a few likely causes, such as poor site choice, incorrect watering, crowded plants, or unsuitable planting dates. Check the simplest causes first instead of buying more products or making several changes at once. A clear diagnosis gives you a better chance of fixing the problem.
Plants can also struggle because of disease, pests, extreme weather, or unsuitable soil. Some symptoms overlap, so one yellow leaf or one wilted stem is not enough to prove a specific cause. Look at the whole plant and the growing conditions before deciding what to do.
Planting too much
A large first garden can become hard to water, weed, and harvest. Start with fewer plants and expand when you have a routine.
Ignoring sunlight
Sun-loving plants may grow weakly in shade. Match the plant to the actual light at the site.
Watering on a fixed schedule
A set schedule can lead to dry or soggy soil when weather and plant needs change. Check moisture before watering.
Using too much fertilizer
Extra nutrients do not fix every growth problem and can cause damage. Check soil and plant needs first.
Crowding plants
Tight spacing can limit airflow and make care harder. Follow mature spacing guidance.
Giving up after one failure
A failed crop can provide useful information. Review planting time, site conditions, moisture, and pest signs before trying again.
What to Check When Plants Look Unhealthy
Start with the soil and the roots. Check whether the soil is too dry or too wet, whether water drains away, and whether the plant was recently moved. Next, look at the leaves and stems for insects, holes, spots, discoloration, or soft tissue.
If the cause remains unclear, take clear photos of the whole plant and the affected parts. Note the plant name, location, recent weather, and watering pattern. A local Cooperative Extension service or a qualified plant diagnostic service may be able to help identify the issue.
Dry soil
Water the root zone as needed, then check whether the plant recovers.
Wet soil
Pause extra watering and check drainage before adding more water.
Leaf damage
Look for pests, physical injury, or disease signs before choosing a treatment.
Slow growth
Review light, temperature, spacing, soil condition, and the plant’s normal growth rate.
12. A Simple Garden Plan for Your First Month
A first-month plan gives you a clear path without requiring you to finish every task in one weekend. The timing will vary with the season, weather, and plant type, so use the stages as a guide rather than a strict calendar. Do not plant a crop outdoors until local conditions are suitable for it.
Stage 1: Plan the site
Choose the garden type, track sunlight, check access to water, and contact 811 before digging where required.
Stage 2: Prepare the bed
Check the soil, remove weeds, improve the growing area as needed, and set out paths or containers.
Stage 3: Plant
Choose suitable seeds or transplants, follow spacing and depth instructions, and water the root zone.
Stage 4: Check and adjust
Watch moisture, remove small weeds, inspect new growth, and make changes based on what the plants show.
What Success Looks Like in the First Month
Success does not mean every plant grows at the same speed or that the garden is free of weeds. A good start means the site suits the plants, the soil stays within a suitable moisture range, and seedlings or transplants show signs of settling in.
Some seeds take longer to sprout, and some perennials focus on root growth before producing much new foliage. Compare progress with the expected growth for each plant. If a plant is clearly failing, check its needs and correct the cause rather than changing the whole garden at once.
Look for steady growth
Healthy new leaves and firm stems can be useful signs when they match the plant’s normal growth pattern.
Keep care simple
Focus on suitable light, water, soil, and weed control before adding extra tasks.
Frequently Asked Questions
Q
How do I start a garden for the first time?
Choose a small, accessible site, check sunlight and drainage, and decide what you want to grow. Prepare the soil or choose suitable containers, then plant varieties that match your local climate and season. Water as needed and inspect the plants often.
Q
What is the easiest thing to grow in a garden?
The easiest choice depends on your region, season, sunlight, and skill level. Radishes, lettuce, bush beans, and some herbs can be approachable options under suitable conditions. Read the seed packet and choose a crop that fits your available light and growing season.
Q
How many hours of sunlight does a garden need?
Many fruiting vegetables grow best with about six to eight hours of direct sunlight each day. Some leafy greens and shade-tolerant plants can grow with less. Check the needs of each plant before choosing the site.
Q
How often should I water my garden?
There is no fixed schedule that suits every garden. Check soil moisture near the roots and account for rain, heat, soil type, plant size, and container drainage. Water when the root zone needs it, and avoid keeping the soil constantly soggy.
Q
Is it better to plant seeds or buy young plants?
Seeds often cost less and offer more varieties, while young plants can save time and provide a head start. Some crops grow well from direct sowing, while others benefit from being started indoors or bought as transplants. Choose based on the crop, local season, and the time you have.
Q
Can I make a garden without a backyard?
Yes. Containers can work on a balcony, patio, porch, or other suitable space with enough light. Use pots with drainage holes and a suitable potting mix. Check the weight limits of balconies and follow building rules before setting up large containers.
Q
Why are my garden plants turning yellow?
Yellow leaves can result from overwatering, underwatering, nutrient problems, pests, disease, or natural leaf aging. Check the soil moisture, drainage, and the pattern of yellowing before treating the plant. If the cause is unclear, seek help from a local Cooperative Extension service or plant diagnostic resource.
✦ Wrapping Up
Conclusion
Learning how to do the garden starts with a few sound choices. Pick a suitable site, understand the soil, select plants that match the local climate, and give them the light and water they need. You can grow vegetables, flowers, or herbs in a backyard bed or a few containers.
Keep the first garden small enough to care for. Watch how the plants respond, remove weeds early, and make changes based on what you see. A garden grows through steady care and small lessons, not by getting every detail right on the first day.
💡 Key Takeaway
This week, choose one small garden area, check its sunlight for a full day, review your local planting dates, and select two or three plants suited to that space. Prepare the growing area before you buy more supplies.