
My garden always feels a little sad in winter. I dream of spring. I start dreaming up new ways to grow my favorite veggies.
This year, I really got into starting seeds indoors. It’s like magic, watching tiny sprouts push through the soil. But I quickly learned something.
The right gear makes all the difference. I used old margarine tubs at first. Big mistake.
They dried out too fast. Or they got too wet. My little seedlings looked miserable.
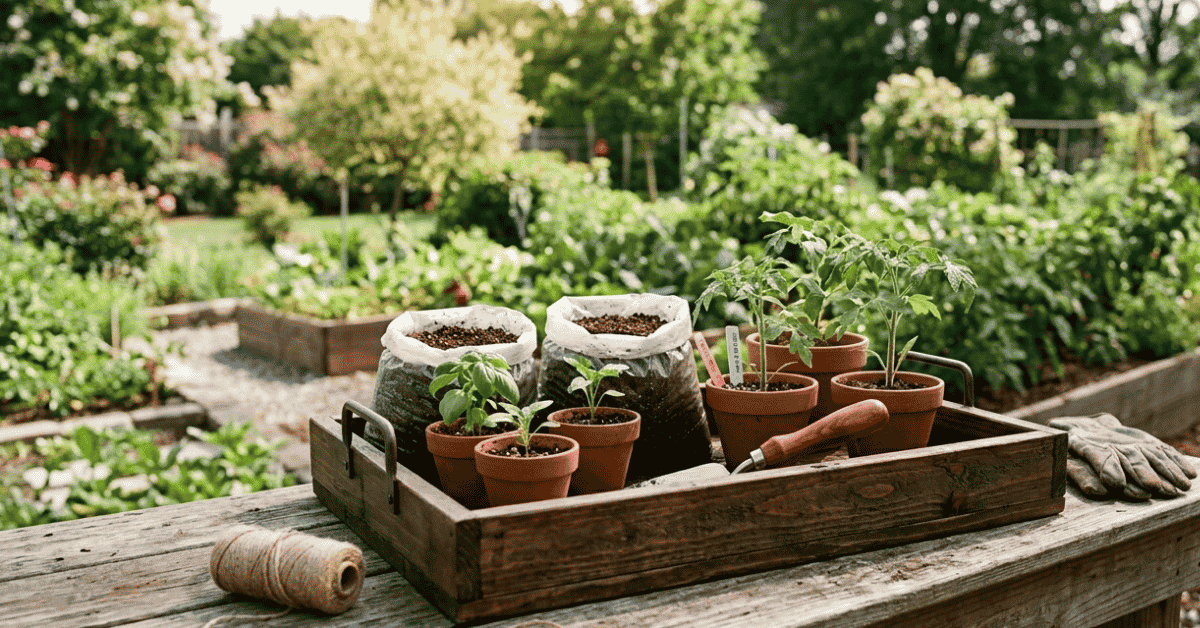
Then I found my first real gardening tray. Wow. What a game-changer.
It changed everything for my indoor garden.
What’s So Great About a Gardening Tray?
Honestly, before I owned one, I wondered if it was just another fancy gadget. But using a gardening tray is a whole different ballgame. It’s the backbone of successful seed starting.
It holds everything together. The soil stays put. The water is managed better.
It’s a simple tool that makes a huge impact. I’ve seen my seedlings go from weak and struggling to strong and vibrant since I started using them correctly. It’s not just about holding dirt.
It’s about creating the perfect little home for baby plants to grow big and strong.
Keeping Things Tidy and Moist
One of the biggest problems I used to face was water. Either too much or not enough. With a gardening tray, especially the ones with a reservoir, it’s much easier.
The tray holds the soil. It has little holes for drainage. But the key is the bottom tray.
It catches the water. This means my little plants can sip water as they need it. It’s called bottom watering.
It’s way better for the roots than top watering. Top watering can wash away tiny seeds. It can also create a hard crust on the soil surface.
That makes it tough for sprouts to break through. A good gardening tray system prevents all that. It creates a consistent moisture level.
That’s vital for germination and early growth. I remember one time I forgot to water for a whole day. Usually, that would be a disaster for my seedlings.
But because of the tray’s reservoir, they were still nice and moist. I was so relieved!
Space Efficiency for Seedlings
My windowsills are not huge. I live in an apartment. So space is always a concern.
Gardening trays are brilliant for this. They are designed to be stacked. Or they fit neatly side-by-side.
This means I can start dozens of seedlings in a small area. I can grow a lot of plants. I don’t need a whole greenhouse.
My apartment doesn’t have one. I can fit several trays on a sturdy shelf or a dedicated grow light setup. It’s a very productive use of limited space.
I love seeing rows of little green shoots. It feels like I’m really making the most of my space. In the past, I’d cram pots everywhere.
Now, everything is organized. It looks much neater too. It feels less chaotic.
I can easily access each tray to check on my plants or give them a little air.
Protecting Your Young Plants
Those first few weeks are delicate. Tiny seedlings are fragile. They can easily be damaged.
A gardening tray offers them a bit of protection. The sides of the tray act as a barrier. They stop me from accidentally knocking them over.
They protect them from drafts too. If I have a fan on, the tray shields them from direct, strong air. It creates a more stable micro-environment.
This is super important. It helps prevent transplant shock later on. When they are ready to move to bigger pots or outside, they’ve had a good, stable start.
I once had a very curious cat. He loved sniffing around my plants. A sturdy tray kept his paws from digging in.
That was a real lifesaver!
Different Types of Gardening Trays
Not all gardening trays are the same. They come in different styles. Each has its own perks.
Figuring out which one is best for you depends on your setup and what you want to grow. I’ve tried a few. I have my favorites.
Standard Seedling Trays
These are the most basic. They are usually shallow and rectangular. They have lots of individual cells or one large compartment.
You fill them with seed-starting mix. Then you plant your seeds. They often come with a clear plastic lid.
This lid acts like a mini-greenhouse. It keeps the humidity high. That’s great for germinating seeds.
However, these trays usually don’t have a separate water reservoir. You need to water them carefully from the top. Or you can use the old-school method of setting them in a shallow water bath.
They are good for beginners. They are also often the cheapest option.
Seedling Trays with Reservoirs
This is what I use now the most. These trays have a main tray with cells. Then there’s a second, solid tray underneath.
This bottom tray acts as a water reservoir. You fill the bottom tray with water. The main tray sits in it.
The soil in the cells wicks up the water through drainage holes. This is the bottom watering method I mentioned. It’s incredibly consistent.
It also reduces the risk of overwatering or underwatering. My seedlings look so much happier with this system. It takes a lot of the guesswork out.
You just need to keep the reservoir filled.
Customizable Tray Systems
Some systems let you mix and match. You might buy individual pots or cells. Then you can arrange them in a larger tray.
This gives you a lot of flexibility. You can choose cell size. You might want deep cells for root vegetables.
Or smaller cells for tiny seeds. You can also swap out cells if one happens to break. This can be a great investment if you plan to do a lot of seed starting.
You can tailor it to your needs each season.
Material Matters
Trays are made from different stuff. Most are plastic. Some are harder plastics.
Others are more flexible. Harder plastics tend to last longer. Flexible plastic trays can be easier to get seedlings out of.
Some compostable trays are available too. These are great if you want to reduce plastic waste. You can often plant the whole cell directly into the ground.
Just make sure they are sturdy enough. I find the sturdier plastics work best for me. They hold their shape and don’t crack easily.
How to Use Your Gardening Tray Like a Pro
Getting a tray is one thing. Using it effectively is another. Here’s how I get the most out of mine.
Preparation is Key
Before you even put soil in your tray, clean it. I scrub mine with soap and water. Sometimes I do a quick rinse with diluted vinegar.
This gets rid of any old mold or bacteria. You don’t want to start your new seedlings with nasty stuff. Make sure the tray is completely dry afterward.
This might seem obvious, but starting with a clean slate is important.
The Right Soil Mix
Don’t just grab dirt from your yard. You need a special seed-starting mix. It’s fine-textured.
It drains well. It also has nutrients to get those first leaves going. I like a mix that’s peat or coir based.
I usually add a little perlite for extra drainage. Some people add vermiculite. It helps retain moisture.
I mix it all up in an old tub or wheelbarrow. Then I moisten it before filling the tray. This stops it from being too dusty.
Filling and Planting
I loosely fill the cells or compartments with my pre-moistened mix. I don’t pack it down hard. Just a gentle press is good.
Then I plant my seeds. I follow the depth recommendation on the seed packet. Usually, it’s about twice the width of the seed.
I use a pencil tip or a small dibber to make the holes. Then I carefully cover the seeds. I gently pat the soil down.
Watering Wisely
If you have a reservoir tray, fill the bottom tray with about an inch of water. Let the soil soak it up. If you have a standard tray, you can water gently from the top.
Or use a water bath. The soil should be moist, like a wrung-out sponge. Not soggy.
Not bone dry. I check mine daily, especially if it’s warm.
Providing the Right Conditions
Most seeds need warmth to sprout. I use a seedling heat mat under my reservoir trays. This provides consistent bottom heat.
It speeds up germination. Once the seeds sprout, the heat mat is usually not needed. I also put a clear plastic dome or lid over the tray.
This traps humidity. It keeps the baby plants from drying out. I open the dome for a few minutes each day to let in fresh air.
This prevents mold and damping off.
Light is Crucial
As soon as you see sprouts, they need light. Strong light, but not direct hot sun at first. I use LED grow lights.
I keep them about 3-4 inches above the seedlings. I run them for 14-16 hours a day. If you don’t have grow lights, a very bright, sunny window can work.
But you’ll need to rotate the tray often. Seedlings will stretch and get leggy if they don’t get enough light. I’ve definitely had leggy seedlings.
It’s a sign they need more light.
Hardening Off
This is a critical step. Before you move your seedlings outside, they need to get used to it. This is called hardening off.
Start by putting them outside in a shady, protected spot for a couple of hours. Bring them back in. Do this for a week or so.
Gradually increase the time they spend outside. Also, expose them to more direct sun. This process prepares them for outdoor conditions.
It stops them from getting a shock. It will save your plants a lot of stress. I learned this the hard way with my first few batches.
Comparing Tray Options for Your Garden
Here’s a quick look at how some common tray types stack up.
| Tray Type | Best For | Pros | Cons |
|---|---|---|---|
| Standard Seedling Tray | Beginners, budget-conscious | Affordable, available everywhere | Can dry out quickly, requires careful watering |
| Tray with Reservoir | Consistent moisture needs, busy gardeners | Easy watering, prevents over/underwatering | More expensive, requires filling reservoir |
| Customizable Systems | Advanced growers, specific plant needs | Flexible cell sizes, adaptable | Can be costly, requires assembly of multiple parts |
| Compostable Trays | Eco-conscious gardeners | Biodegradable, can plant directly | May not be as durable, can dry out faster |
When to Re-pot Your Seedlings
You’ll know it’s time to re-pot when the roots start coming out of the drainage holes. Or when the seedlings look crowded. They might also outgrow their cells.
It’s usually around 3-6 weeks after planting. Depending on the plant. Don’t wait too long.
Overcrowded seedlings compete for resources. They won’t grow as strong. It’s exciting to see them get bigger.
It means your seed starting efforts are paying off. That moment when you transplant them to their final spot is so rewarding.
What are the ideal dimensions for a gardening tray for starting seeds?
Most standard trays measure about 10×20 inches. Cell sizes vary. Learn more about optimal tray sizes.
Can I reuse old gardening trays?
Yes, but clean them thoroughly first. Learn more about sanitizing gardening supplies.
How often should I water seedlings in a reservoir tray?
Check the reservoir level every few days. Refill as needed. Learn more about watering needs.
What is damping off and how can gardening trays help prevent it?
Damping off is a fungal disease. Good air circulation and proper watering prevent it. Learn more about common seedling problems.
Are there gardening trays made from recycled materials?
Yes, many companies offer trays made from recycled plastics. Learn more about sustainable gardening options.