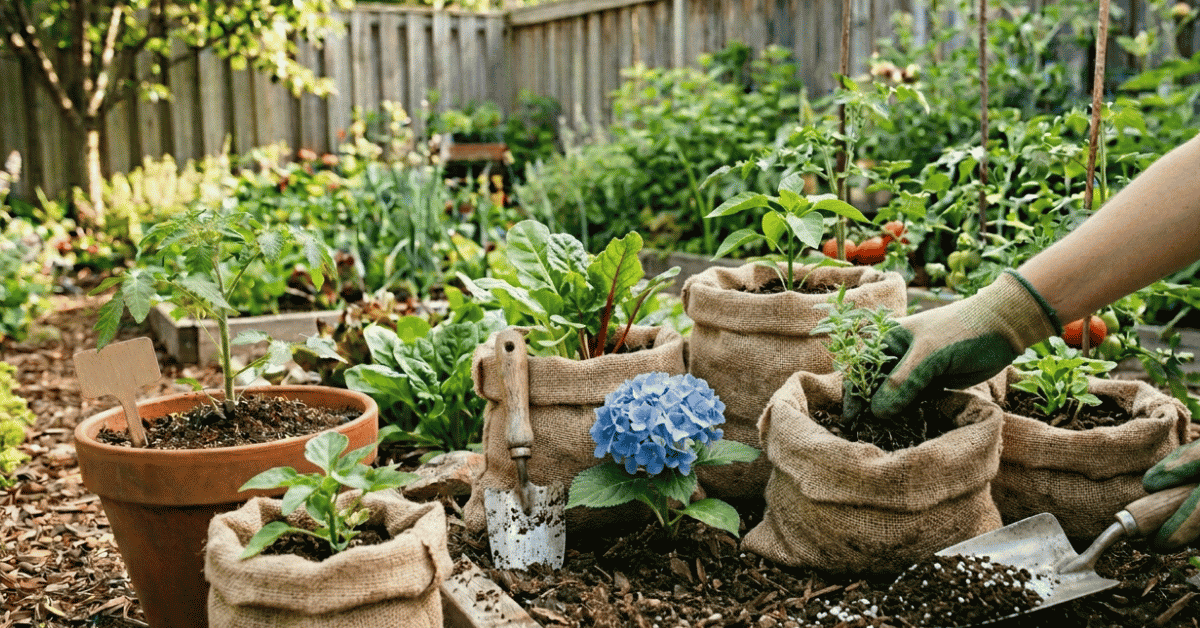
I found burlap garden bags can make a real difference for many gardeners. They offer a neat and easy way to grow plants almost anywhere. You can use them on patios, balconies, or even right on your lawn.
I’ve had great fun with them. Let me show you how they can help your garden dreams take root too.
What’s So Great About Burlap Bag Gardening?
Honestly, I was a bit skeptical at first. burlap? For gardening? But I tried it, and wow, it totally changed how I approach growing things.
It’s way simpler than I thought. You get this rustic, cool look, and your plants seem to love it. It’s kind of like giving them their own cozy little home.
My First Burlap Bag Garden Adventure
I remember one sunny Saturday last spring. I had a bunch of tomato starts and nowhere to put them. My garden beds were full.
I saw some big burlap bags my neighbor was using for something. I asked if I could have a couple. He shrugged, said “sure.” I lugged them home, filled them with good soil and compost, and popped in my extra tomato plants.
I honestly didn’t expect much. But by mid-summer, those tomatoes were overflowing the bags! They were stronger and produced more fruit than the ones in the ground.
That’s when I knew I was onto something special.
Easy Setup, Easy Moving
One of the biggest wins for me is how simple they are to set up. No digging fancy beds or hauling loads of lumber. You just grab a bag, some good soil, and your plant.
And if you need to move things around? No problem. You can shift them easily.
This is a lifesaver if you need to chase the sun or get them out of a sudden storm.
Good for the Plants, Good for the Planet
Burlap is natural. It breathes. This means the roots get plenty of air.
It also lets excess water drain away. This stops your plants from getting soggy feet, which is a huge help. Plus, when the season is done, you can often just compost the bag itself.
It breaks down naturally. That’s a nice feeling, knowing you’re not adding plastic waste to the landfill. It’s part of what makes coconut fiber gardening so great too, natural materials helping your plants thrive.
Aesthetically Pleasing
Let’s face it, they look good. That natural, earthy texture adds character to any space. It’s a charming, rustic vibe that you can’t quite get with plastic pots or raised beds.
It makes my patio feel more like a real garden.
Getting Started with Your Burlap Bag Garden
Setting up is where the magic really begins. It’s straightforward and satisfying. You feel like you’re creating something beautiful right away.
Choosing the Right Bag
Not all burlap bags are created equal. You want ones that are sturdy. Look for bags that are tightly woven.
They should feel substantial. Some bags might have a plastic liner. That’s usually okay, but pure natural burlap is best for breathability.
The size of the bag depends on what you want to grow. For big plants like tomatoes or potatoes, go big. For smaller herbs or flowers, a smaller bag works fine.
What Kind of Soil to Use
This is super important. Don’t just grab dirt from your yard. You need a good quality potting mix.
I like to mix my own. I usually use about 60% peat moss or coconut coir, 20% compost, and 20% perlite or coarse sand. That blend gives good drainage and holds enough moisture.
It also lets the roots breathe well. Think of it like building a comfy bed for your plant. Using materials like coconut gardening essentials can really boost your soil’s performance.
Planting Your Burlap Bag Garden
Once your bag is filled with soil, it’s time to plant! Make a hole in the soil big enough for your plant’s root ball. Gently place the plant in the hole.
Then backfill with soil, patting it down gently around the base. Don’t pack it too hard. Leave a little space at the top of the bag for watering.
What Can You Grow in Burlap Bags?
The list is pretty long! I’ve had success with so many different things. It’s really versatile.
Vegetables Galore
Tomatoes, peppers, and even cucumbers do wonderfully. Potatoes are fantastic in bags. You can just tip the bag over when they’re ready to harvest!
Salad greens like lettuce and spinach work well too. Root vegetables like carrots can be a bit tricky, but with a deep enough bag, they can be managed. The great thing is, you can have a vegetable garden even if you don’t have a traditional yard.
Herbs for Every Dish
Fresh herbs are a must for my kitchen. Basil, mint, parsley, rosemary, thyme, they all thrive. You can group a few different herbs in one larger bag.
Or dedicate a bag to your favorite, like a big basil plant.
Flowers for Color and Cheer
Gorgeous flowers can brighten up any space. Petunias, marigolds, zinnias, and salvias look stunning spilling out of burlap bags. You can create beautiful displays.
Mix and match colors and textures. It makes your patio or balcony feel like a designer garden. Some people even use them for small fruit bushes, like blueberries!
Burlap Bag Gardening vs. Other Methods
Here’s a quick look at how burlap bags stack up against other common gardening containers.
| Feature | Burlap Garden Bags | Plastic Pots | Wooden Raised Beds |
|---|---|---|---|
| Breathability | Excellent | Poor | Good |
| Drainage | Excellent | Good (with drainage holes) | Excellent |
| Portability | Very Easy | Easy | Difficult to Impossible |
| Cost | Low to Moderate | Low to Moderate | High |
| Durability | Moderate (can degrade over time) | High | High (requires maintenance) |
| Environmental Impact | Natural, biodegradable | Can be a plastic waste issue | Can be wood sourced sustainably |
| Aesthetics | Rustic, Natural | Varies widely | Natural, Can be elegant |
Watering and Feeding Your Burlap Plants
Taking care of plants in burlap bags is pretty standard, but there are a few things I’ve learned.
How Often to Water
Burlap bags can dry out faster than larger pots because they breathe so well. I check my bags daily, especially when it’s hot. Stick your finger about an inch or two into the soil.
If it feels dry, it’s time to water. Water deeply until you see it come out the bottom. Don’t just sprinkle the top.
That doesn’t help the roots.
Feeding Your Plants
Since you’re using potting mix, it has nutrients, but they won’t last forever. I usually start feeding my plants about a month after planting. I use a balanced liquid fertilizer.
I feed them every two to three weeks. Always follow the package instructions. Don’t overdo it, as that can harm the plants.
Dealing with Pests and Diseases
Burlap bags can actually help reduce some soil-borne diseases because the soil is contained. They also help keep pests from burrowing up from the ground. However, above-ground pests can still be an issue.
Regular checks are key. If you see bugs, try natural remedies first. A strong spray of water can often knock aphids off.
For tougher problems, insecticidal soap is a good option. You can also use things like copper for your garden to help prevent certain issues.
Troubleshooting Common Burlap Bag Issues
Even with the best intentions, sometimes things go wrong. Here are a few common problems and how I fix them.
Bag is Drying Out Too Fast
This is common, especially with smaller bags or during heatwaves. Try watering more frequently. You can also mulch the top of the soil with coconut fiber or straw.
This helps keep moisture in. Moving the bags to a shadier spot during the hottest part of the day can also help.
Plant Looks Stunted or Yellow
This often means the plant isn’t getting enough nutrients or water. Check your watering schedule first. If that seems okay, it’s time to feed your plant.
A good dose of balanced liquid fertilizer should perk it up. Make sure the bag is getting enough sun too, depending on the plant’s needs.
My Burlap Bag is Sagging or Ripping
Burlap is natural and will eventually break down. If it’s sagging, the soil might be too wet, or the bag might just be getting old. If it’s ripping, it’s probably time to replace it.
This is usually after a year or two of good use.
Wrapping Up Your Burlap Bag Gardening Journey
Burlap bag gardening has been a total game-changer for me. It’s easy, it’s effective, and it looks fantastic. It lets you garden almost anywhere.
You can grow your own fresh food and beautiful flowers with less fuss. Give it a try. You might be surprised at how much you love it!
How do I prepare a burlap bag before planting?
Clean the bag and ensure good drainage by poking a few small holes in the bottom if they aren’t already there. Learn more about preparing your garden space.
Can I use regular garden soil in burlap bags?
No, it’s best to use a high-quality potting mix or a blend of compost, peat moss, and perlite for optimal drainage and aeration. Learn more about soil amendments.
How often should I fertilize plants in burlap bags?
Fertilize every 2-4 weeks during the growing season with a balanced liquid fertilizer, following package instructions closely. Learn more about plant nutrition.
Will burlap bags last for more than one season?
Many burlap bags can last one to two seasons, but natural fibers will eventually degrade. Inspect for wear and tear before replanting. Learn more about durable gardening materials.
Are there any plants that don’t do well in burlap bags?
Very large trees or plants with extensive root systems that need deep anchorage might not be ideal. Stick to vegetables, herbs, flowers, and smaller shrubs. Learn more about plant suitability.