
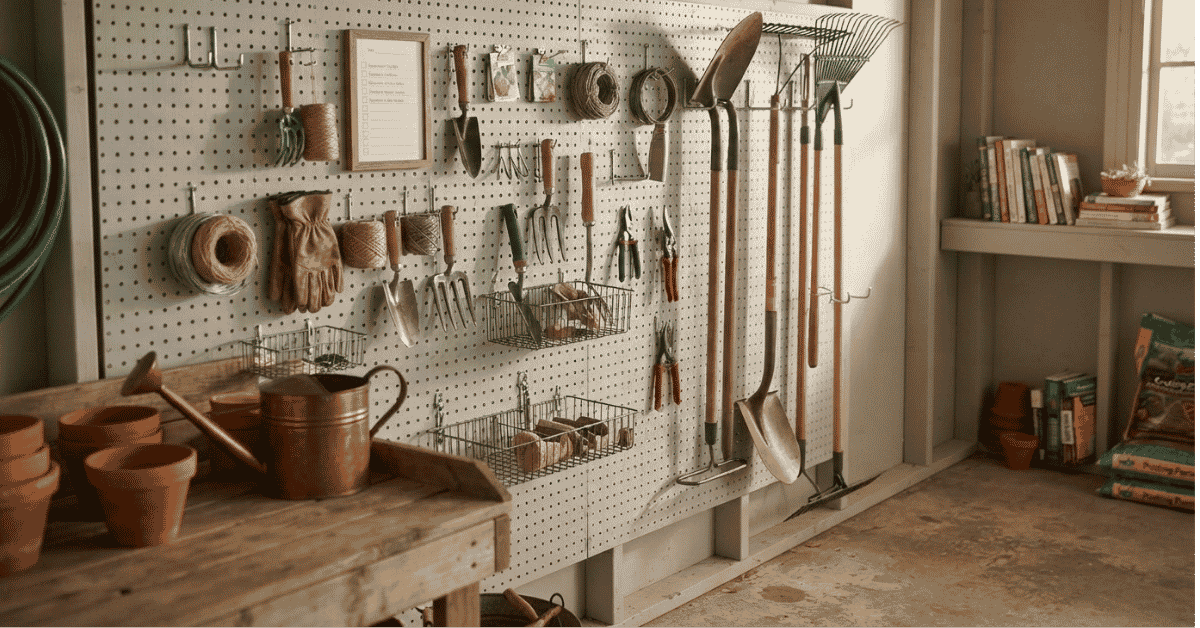
Pegboard Garden Tools can turn a jammed shed wall into a neat tool hub. Learn hook types, layout tips, load checks, and care steps that keep each tool close, safe, and easy to grab each day.
I used to toss my yard tools in one dark bin.
That choice made each task feel like a chore.
A pegboard gave each tool its own small spot.
The wall soon felt calm, clean, and easy.
I could see each rake, hoe, and fork.
No more deep digs through a pile of steel.
This guide shares the tips I now use.
Read on, then plan your own tool wall.
Can Pegboard Garden Tools Fix Shed Mess?
I first tried a pegboard on a wet spring day.
Rain had left the yard soft and slick.
My shed floor had mud near each tool.
A rake lay flat by the old mower.
I pulled it out and heard steel scrape.
A hand hoe caught on my old spade.
Then my work gloves fell from the pile.
I stood there and felt quite fed up.
The pegboard sat on one bare shed wall.
At first, it seemed too neat for me.
I thought tools might fall from each hook.
That doubt kept me from trying it soon.
Still, I hung one rake on a hook.
Then I hung one hoe right beside it.
The wall soon had a clear row of tools.
Each piece had a spot I could see.
I guess that small test won me over.
The wall was not just for looks.
It made each yard task feel much less hard.
Life Before I Found This
My old shed had no real tool plan.
Long tools leaned by the door each day.
Small tools hid in a deep box.
The floor felt cold and damp each dawn.
Dust sat on the steel of my rake.
Loose soil stuck to my hoe head.
The shed had that rich smell of wet earth.
Each tool made a sharp clank at times.
That sound got old quite fast.
I also lost track of small hand tools.
A trowel might hide under gloves.
A hand fork might sit in a bin.
The worst part was the wasted time.
I knew each tool was in that shed.
I just could not see it at once.
A pegboard gave me a new view.
The wall became part of my tool kit.
Why This Matters Right Now
Many yards need more tools than folks think.
A small yard may need ten tools or more.
Rakes, hoes, forks, and spades take room.
Hand tools add even more clutter.
Small sheds can make this issue worse.
Floor space may be tight from the start.
A wall can add a new zone for gear.
Pegboards work well for this type of need.
They let hooks shift as tool needs change.
That can help as your tool set grows.
A neat wall may also cut trip risk.
Loose tools on floors can catch feet.
Long handles can block a shed path.
Good tool care matters too.
Clean tools stay off wet shed floors.
Steel heads can dry with more air flow.
For me, the best gain is still time.
I spend less time just finding tools.
The First Big Lesson
The hook is only part of the plan.
The board and mount matter just as much.
A pegboard must sit on a firm base.
Thin board may not suit heavy yard tools.
A wood frame can help give more support.
You also need the right hook size.
Small hooks work well for light hand tools.
Larger hooks suit long tools with more weight.
Tool shape matters as much as tool weight.
A flat rake head needs room to hang.
A thick hoe handle needs a firm grip.
I now sort tools before I hang them.
Long tools go in one clear row.
Small tools stay near my work bench.
That setup cuts reach and grab time.
It also keeps each tool easy to spot.
One more lesson came from a failed hook.
I once used a hook that felt too loose.
The tool slid off after a few uses.
Now I test each hook by hand first.
A firm fit gives me more peace of mind.
Small Tactics That Actually Work
I use a few plain rules for my wall.
These rules keep my pegboard neat and safe.
First, group tools by size and use.
Keep rakes and hoes in one zone.
Put hand tools in a low row.
Next, leave room between each tool.
Crowded tools can bump and clash.
They also make each tool hard to grab.
I like the most used tools near reach.
Rare tools can sit higher on the wall.
That saves steps during most yard tasks.
Mark each tool spot if needed.
A small tag can help new users learn.
It also helps keep the wall neat.
Keep sharp heads facing a safe path.
Do not let blades point toward walk space.
This small step can lower the risk.
Check each hook from time to time.
Loose hooks can shift with use.
Clean tools before you hang them back.
Brush off dirt, then let wet steel dry.
That habit can help cut rust and wear.
The goal is not a show wall.
The goal is a wall that works.
A Strange Detail I Noticed
One odd thing stood out after setup.
My shed felt much larger than before.
The floor had not grown by one inch.
The shed walls had not moved at all.
Yet the room felt less tight.
I think the sight of open floor helped.
My eyes no longer saw a pile of gear.
They saw clear space and neat tool rows.
I also heard less metal clank each day.
That small sound change felt oddly nice.
Another odd gain came from the tool heads.
They stayed clean for much longer.
Loose floor dust had coated them before.
The pegboard kept them high and dry.
Maybe neat storage has a mood gain too.
A clean wall can make work feel less dull.
Style Comparison & Data
Each pegboard setup can serve a distinct need.
I pick the board and hook with care.
| Setup Type | Best Tool Set | Main Gain |
|---|---|---|
| Small Pegboard | Hand tools | Saves bench space |
| Wide Pegboard | Mixed tools | Holds more gear |
| Framed Board | Heavy tools | Adds wall support |
| Rail Board | Often changed tools | Easy hook moves |
Small boards fit tight sheds quite well.
Wide boards suit folks with many tools.
Framed boards can help with heavy loads.
Rail styles suit tool sets that often change.
The best setup depends on your wall space.
Your tool mix matters just as much.
Non-Obvious Gains
Pegboard garden tool storage can help in ways beyond neat looks.
- Less tool wear: Tools stay off hard shed floors.
- Fast tool checks: Each item stays in plain sight.
- Less lost gear: Small tools have set spots.
- More free floor: Long tools leave floor space open.
- Better care: Dirt and wet spots are easier to spot.
- Easy tool swaps: Hooks can move as needs shift.
- Less task stress: You spend less time hunting.
- More shed use: Clear walls can free floor space.
I did not plan for all these gains.
Most came from a simple wall setup.
Myths vs. My Reality
I used to think pegboards were for shops.
Then I saw one work well in sheds.
I used to think they looked too plain.
Then I saw a full wall of clean tools.
I used to think hooks would keep falling off.
Then I learned to match hooks with load.
I used to think setup would take hours.
Then I made a tool map first.
I used to think all boards were the same.
Then I saw big gaps in board strength.
I used to think more hooks meant more room.
Then I learned that too many hooks cause clutter.
I now leave some spots open on purpose.
That gives me room for new tools later.
The big shift was not the board itself.
It was the plan behind the board.
Essential Principles for Mastery
A good pegboard wall starts with one plan.
Do not hang tools at random from day one.
Start by sorting your tools into groups.
Make one group for long tools.
Make one group for hand tools.
Keep sharp tools in a safe zone.
Next, check your wall before you drill.
Know if it has wood, drywall, or brick.
Use the right mount for that wall type.
Then check the hook load before use.
Do not trust looks alone.
Leave space for each tool head.
This makes grab and return much more smooth.
Place often used tools near hand height.
Keep less used tools higher up.
Use a clear path near the board.
Do not let handles stick into walk space.
Check hooks and mounts each month.
Look for loose parts, wear, or rust.
Last, keep the wall easy to use.
A neat setup should not feel hard to keep.
If one hook feels wrong, move it.
The best wall fits your real work habits.
FAQs About Pegboard Garden Tools
Can a pegboard hold heavy garden tools?
Yes, some pegboards can hold heavy tools. Use a strong board, firm mount, and hook made for the load. Check each part before hanging large rakes, hoes, or steel tools.
Do pegboards work for small garden tools?
Yes, pegboards suit hand tools very well. Small hooks can hold trowels, hand forks, snips, and gloves. A low row can keep these tools close to your work spot.
Should I use wood or metal pegboard?
Both can work well. Wood can fit many home sheds and looks warm. Metal can suit a hard-use space. Your tool load, wall type, and hook style should guide your pick.
How much space should I leave between tools?
Leave enough room for each tool to come off with ease. Wide rake heads need more space than hand tools. A bit of extra room can also stop tool heads from clash.
Can pegboard hooks fall out?
They can if the hook does not fit the board. Poor wall mounts can also cause issues. Use hooks made for your board type, then test each hook with care before use.
My Final Takeaway
Pegboard garden tools changed my shed in one day.The wall went from bare to useful.My tools gained spots that made sense.My floor gained space I could use.
I still like a plain, no-fuss setup.
I do not need a wall full of gear.
I just need each tool close and safe.
Start with one board and a few hooks.
Then let your own work shape the rest.