Ready to transform your gardening experience? Discover how grow bags can help you grow more food in less space. This guide shares my secrets for amazing harvests.
What Are Grow Bags For Gardening?
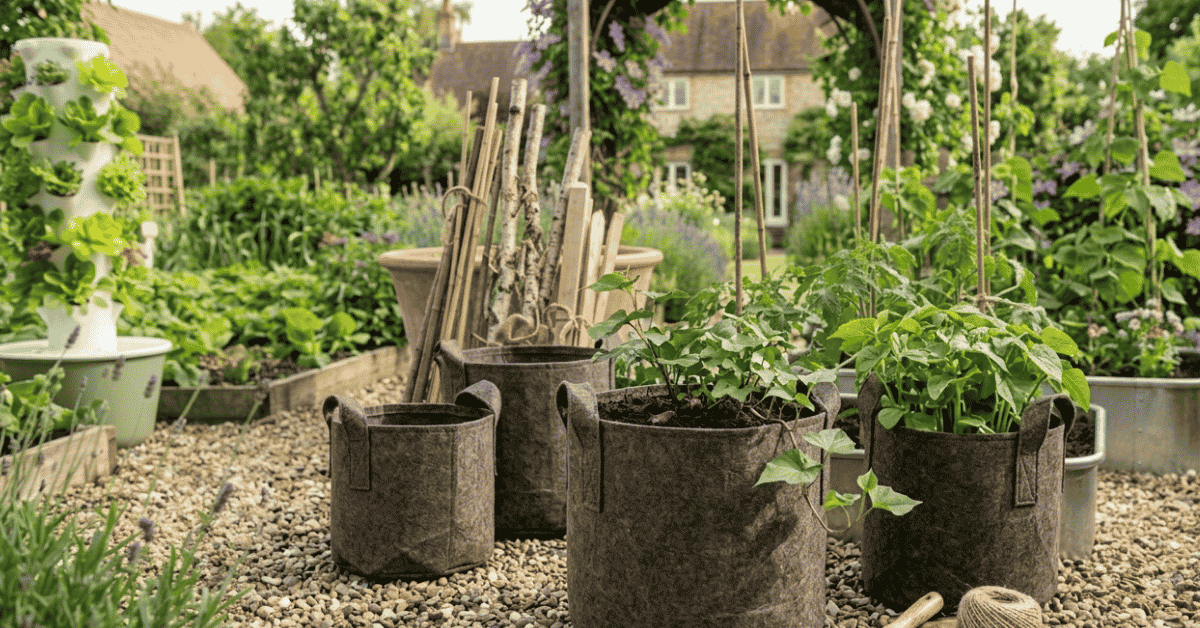
Basically, grow bags are just containers for your plants. They’re usually made of fabric. Think of them as pots without hard sides.
I started using them a few years ago, and honestly, my garden has never been better. They’re light, they’re easy to move, and they seem to make my plants really happy.
Why Use Grow Bags For Gardening?
Using grow bags feels like a game-changer for anyone who gardens. They have so many perks that I’ve found myself leaning on them more and more. Let me tell you why I think they’re so great.
Air Pruning Roots
This is a big one for me. When plant roots hit the sides of a plastic pot, they circle around. This leads to root-bound plants.
Grow bags, because they’re fabric, let the roots breathe. When a root tip reaches the edge, it gets air and stops growing. New roots then sprout from the tip.
This causes roots to branch out more. It makes a much healthier, more vigorous root system. I noticed my tomato plants grew way bigger when I switched to grow bags.
They just seemed to have more energy.
Better Drainage
Drainage is crucial for healthy plants. Too much water can drown roots. Too little water dries them out.
Grow bags are fantastic for drainage because excess water just drains right out through the fabric. I used to struggle with waterlogged soil in my raised beds. With grow bags, I have so much more control.
I can water until the bag feels heavy, and I know the extra water will escape. This means fewer problems with root rot, which is a common killer of garden plants.
Temperature Regulation
Fabric grow bags help keep soil temperatures more stable. Roots don’t like it too hot or too cold. In the summer, dark plastic pots can get scorching hot.
This can cook your plant’s roots. Grow bags are cooler because air can circulate through the sides. In colder weather, they can also help retain a bit of warmth.
I’ve found this particularly helpful for plants that are a bit sensitive to temperature swings.
Portability and Flexibility
This is a huge advantage for me. I don’t have a massive garden. Grow bags let me tuck plants wherever there’s a sunny spot.
I can move them around as the season changes or as I need to make space for something else. If a storm is coming, I can even move my smaller grow bags out of the way. They’re also great for balconies, patios, or even just small corners of a yard.
I once grew a whole summer’s worth of peppers on my concrete patio using grow bags!
Cost-Effective for Small Spaces
While you can buy them in bulk, grow bags are often a more affordable option. Especially for starting out or for smaller gardening plots. They don’t require building elaborate raised beds.
You just fill them with soil and plant. For the yield I get, especially with vegetables, I find them to be a really smart investment.
Reduced Soil Compaction
In traditional pots, soil can get hard and packed down over time. This makes it difficult for roots to grow and for water to penetrate. The flexible fabric of grow bags prevents soil compaction.
The soil stays loose and airy. This makes watering more effective and helps roots spread easily.
What Can You Grow In Grow Bags?
Pretty much anything you can grow in the ground, you can grow in grow bags! I’ve had great success with a wide variety of plants.
Vegetables
- Tomatoes: These do exceptionally well. The deep root system gets plenty of air, leading to bigger, healthier plants. My best tomatoes have always come from grow bags.
- Peppers (Bell and Chili): Peppers thrive in well-drained soil. Grow bags provide this perfectly.
- Leafy Greens: Lettuce, spinach, kale, and swiss chard love grow bags. You can grow them in succession for a continuous harvest.
- Root Vegetables: Carrots, radishes, and beets can be grown if the grow bag is deep enough.
- Beans and Peas: Bush varieties or climbing types (with a little support) do very well.
- Cucumbers and Zucchini: These can get large, so use bigger grow bags for them.
Herbs
Almost any herb will be happy in a grow bag. Basil, mint, cilantro, parsley, rosemary, thyme, the list goes on. I love having a collection of herbs right outside my kitchen door in grow bags.
Flowers
Grow bags are also perfect for annuals and perennials. They brighten up any space on a patio or deck.
Choosing the Right Grow Bags For Your Garden
It’s not just about grabbing any bag. The size, material, and features matter. I’ve learned this through trial and error.
Material Matters
Most grow bags are made from felt or a similar non-woven fabric.
- Felt: This is the most common type. It’s breathable, offers great drainage, and promotes air pruning. It’s durable but can degrade over many years, especially in harsh weather.
- Recycled Materials: Some bags are made from recycled plastics or other materials. They often aim for similar breathability and drainage.
Size is Key
The size of the grow bag you choose depends on what you want to grow.
- Small (1-5 gallons): Good for herbs, single lettuce plants, or small flowers.
- Medium (7-10 gallons): Ideal for bush beans, peppers, compact tomato varieties, or several smaller plants.
- Large (15-25+ gallons): Best for larger plants like standard tomato varieties, zucchini, cucumbers, broccoli, or potatoes. Deeper bags are essential for root vegetables.
A good rule of thumb: Think about how big the mature plant gets and how much root space it needs.
Features to Look For
- Handles: Sturdy handles make moving the bags much easier, especially when they’re full of soil and plants. I can’t stress this enough, get bags with good handles!
- Reinforced Seams: Strong stitching means your bag will last longer and won’t split open under the weight of soil.
- Color: Lighter colors can stay cooler in the sun, which is better for root health in hot climates. Darker colors might absorb more heat.
Growing Bag Comparison
Here’s a quick look at some common choices:
| Bag Type | Pros | Cons | Best For |
|---|---|---|---|
| Standard Felt | Excellent aeration, drainage | Can dry out faster, might degrade over time | Most vegetables, herbs, flowers |
| Thickened Felt | More durable, better insulation | Slightly heavier, might cost more | Larger plants, longer growing seasons |
| Recycled Fabric | Eco-friendly, good drainage | Durability can vary | Similar to standard felt |
| Hybrid (e.g., Plastic Pot with Fabric Liner) | Retains moisture better, durable | Less aeration than pure fabric | Plants needing consistent moisture, very hot climates |
How to Use Grow Bags For Gardening
Using grow bags is pretty straightforward, but a few tips can make a big difference in your success.
Step 1: Choose Your Spot
Find a place that gets the right amount of sunlight for what you plan to grow. For most vegetables, this means at least 6-8 hours of direct sun. Make sure the spot is level and can support the weight of the filled bags.
Step 2: Fill with Quality Soil
Don’t just use garden soil from your yard. It compacts too easily. Use a good quality potting mix.
You can also make your own. A good mix will be light, airy, and drain well. I like to mix compost, peat moss (or coco coir), and perlite.
This makes a fantastic fluffy soil that roots love.
Step 3: Planting Time
Gently place your seedlings or seeds into the soil. Follow the spacing recommendations for your plants. Don’t overcrowd the bag, as this will reduce airflow and can lead to disease.
For my tomato plants, I always give them plenty of room. They get so big!
Step 4: Watering Wisely
This is where grow bags shine, but it requires attention. Check the soil moisture regularly. Stick your finger a couple of inches into the soil.
If it feels dry, it’s time to water. Water until you see water draining from the bottom of the bag. Because they drain so well, you might need to water more frequently than you would in a traditional pot, especially on hot, windy days.
Step 5: Feeding Your Plants
Since grow bags have great drainage, nutrients can wash out faster. You’ll likely need to fertilize more often. Use a balanced liquid fertilizer every few weeks, or use a slow-release organic fertilizer when you plant.
My plants seem to respond really well to a good organic liquid feed.
Step 6: Support If Needed
Larger plants like tomatoes or vining cucumbers will need support. You can use stakes, cages, or simple bamboo sticks inserted into the soil. These can be easily placed within the grow bag.
These simple bamboo sticks saved my plot last year and would work just as well in a grow bag.
Common Problems and Solutions With Grow Bags
I’ve encountered a few snags along the way. Here’s how I’ve addressed them.
Drying Out Too Fast
This is the most common issue, especially in hot weather.
- Solution: Water more frequently. Check the soil daily. Mulch the top of the soil in the grow bag (with straw or wood chips) to help retain moisture. Grouping bags together can also create a microclimate that helps them stay moist longer.
Underwatering
This can happen if you’re not checking the soil moisture regularly.
- Solution: Always do the finger test. If the soil is dry, water thoroughly until it drains from the bottom. For severely dry bags, you might need to water twice.
Overwatering
Even with great drainage, you can still overwater if you’re not careful.
- Solution: Water only when the soil feels dry to the touch. If the bag feels heavy, it’s likely still moist enough. Ensure the drainage holes aren’t blocked.
Nutrient Leaching
Because of the excellent drainage, nutrients can get washed away.
- Solution: Feed your plants regularly with a balanced fertilizer. Compost tea is also a wonderful way to replenish nutrients.
Pests
Pests can still find your plants in grow bags.
- Solution: Inspect your plants regularly. Use organic pest control methods like neem oil or insecticidal soap if needed. Companion planting can also help deter pests.
My Personal Experience With Grow Bags
I remember one summer, my backyard plot was just a mess. The soil was heavy clay, and nothing was growing well. I felt so discouraged.
Then I discovered grow bags. I got a few 10-gallon bags and planted some cherry tomato seeds. Within weeks, they were sprouting and looking so robust.
By mid-summer, I had more cherry tomatoes than I knew what to do with! It was such a win. It gave me the confidence to try more.
That simple gardening hack saved my plot that year and completely changed my perspective.
Frequently Asked Questions About Grow Bags
Are grow bags good for tomatoes?
Yes, grow bags are excellent for tomatoes, offering great aeration for roots. Learn more about their benefits…
Can I leave grow bags outside in winter?
Empty grow bags can often be left outdoors, but they may degrade faster in harsh winter conditions. Learn more about…
Do grow bags need special soil?
Using a high-quality potting mix is recommended for grow bags to ensure good drainage and aeration. Learn more about…
How often should I water plants in grow bags?
Check soil moisture daily; water when the top inch or two feels dry, as they drain quickly. Learn more about…
Are grow bags better than pots?
Grow bags offer superior air pruning and drainage compared to traditional plastic pots. Learn more about…