Straw Bale Gardening’s Smart Start
Ready to grow amazing veggies with less digging? Learn the easy, effective way Joel Karsten teaches straw bale gardening. Discover how to get started today!
What is Straw Bale Gardening Joel Karsten Style?
Joel Karsten’s approach to straw bale gardening is a game-changer. I’ve tried this method, and it’s honestly made gardening so much simpler. It skips the hard work of tilling soil.
Instead, you use straw bales as your garden beds. You “plant” directly into the straw. It sounds wild, I know!
But it really works. This method is perfect if you have bad soil. Or maybe you just hate bending over.
It’s a fantastic way to grow food anywhere. Karsten’s book explains it all so clearly. I felt confident trying it right away.
The Core Idea
The main idea is simple: use straw bales as containers. You break down the straw a bit, add some nutrients, and plant your seeds or seedlings. The straw acts like a raised bed.
It also feeds your plants as it decomposes. It’s a living soil system right in front of you.
Why Try Joel Karsten’s Method?
I found that following Joel Karsten’s advice made my first attempts successful. He breaks down the process into easy steps. This is great for beginners.
It’s less back-breaking work. You don’t need to buy tons of soil. The bales themselves are relatively cheap.
And you can grow a lot in a small space. It’s a clean way to garden too. No mud everywhere!
Is Straw Bale Gardening Joel Karsten’s Idea Truly Worth It?
I’ve personally seen the benefits. Straw bale gardening is totally worth it. For me, it offered a new way to garden when my back was acting up.
It’s also great for small spaces. I even set some up on my patio once. The yield was surprisingly good.
It’s a forgiving system. Even if you miss a step, your plants usually pull through.
Setting Up Your Straw Bale Garden
Getting your straw bales ready is key. This step is crucial for success. Don’t skip it!
It’s what makes the straw a good place for plants to grow.
Choosing the Right Bales
First, you need bales of straw, not hay. Hay has seeds in it. Those seeds will sprout and compete with your vegetables.
You want clean, tightly bound straw bales. Look for golden, dry bales. Avoid anything that looks moldy or damp.
Where to Place Them
Sunlight is important for most veggies. Find a spot that gets at least six to eight hours of sun each day. Level ground is best.
This helps water drain evenly. You can place them directly on grass. The grass will eventually die off.
Or you can put them on top of compost. This adds extra nutrients from the start.
The “Seeding” Process: Getting Them Ready to Grow
This is the most important part. You need to “activate” the bales. This means encouraging decomposition.
It makes the straw soft and nutrient-rich.
- Water them well. Soak the bales thoroughly. You can use a hose with a spray nozzle.
- Add nitrogen. Sprinkle a nitrogen-rich fertilizer over the top. A broadcast spreader works well. About 2 cups per bale is a good start. You can use organic options like blood meal. Or even some compost.
- Water again. This helps the nitrogen soak in.
- Repeat the process. Do this daily for about 10-14 days. You’re essentially jump-starting the decomposition. The straw will start to break down nicely. It will become softer and darker.
Planting Time
After the two weeks, your bales should feel softer. They’ll look a bit like compost. Now you can plant!
- For seeds: Dig small trenches into the top of the bale. Plant your seeds according to packet directions. Cover them with a thin layer of compost or potting mix. This gives them a good start.
- For seedlings: Make a hole in the straw large enough for the plant’s root ball. Gently place the seedling in the hole. Pack straw around the base. Again, a little compost on top helps.
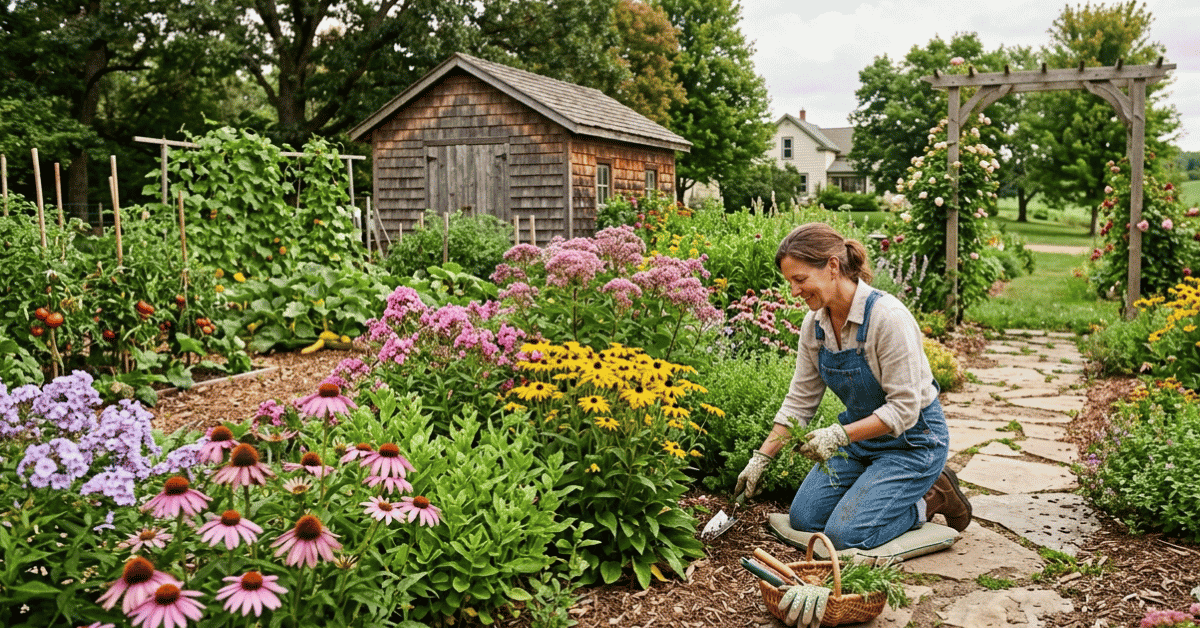
What Can You Grow in Straw Bales?
Almost anything you grow in the ground! That’s the beauty of this method. I’ve had great luck with many things.
Popular Choices
- Tomatoes: They love the raised bed. It keeps them off wet ground. They grow really tall!
- Peppers: Both sweet and hot peppers do well.
- Beans: Bush beans and pole beans are easy. Provide support for pole beans upwards.
- Cucumbers: Similar to tomatoes, they need vertical support.
- Squash and Zucchini: These need a bit more space. But they grow beautifully.
- Leafy Greens: Lettuce, spinach, and kale are fast growers.
- Herbs: Basil, mint, parsley, and chives thrive.
Things to Consider
Vining plants do exceptionally well. They have room to grow up and out. Root vegetables can be a bit trickier.
Carrots and radishes sometimes have a harder time. They need the bale to be well-decomposed. Otherwise, the roots can get stuck.
But with proper prep, it’s still possible. My carrots last year were a bit crooked. But still tasty!
The Lifecycle of a Straw Bale Garden
Straw bales don’t last forever in their original form. That’s part of their magic though. They enrich your soil over time.
Year One
Your bales will be your growing medium. They break down as your plants grow. You’ll see them shrink and soften.
By the end of the season, they’ll look quite different.
Year Two
You can often replant in the same bales. They will be much softer. More like compost.
You might need to add a bit more compost on top. And a little fertilizer to refresh them. The results are usually still good.
After Two Years
Once the bales have mostly broken down, you can mix them into your garden beds. This adds amazing organic matter. It improves your regular soil structure.
It’s like a gift that keeps on giving. My old straw bale spots are now super fertile.
Benefits and Drawbacks
No gardening method is perfect. It’s good to know the pros and cons. I’ve found this to be true through my own trials.
Advantages
- Less Bending: Raised beds mean less strain on your back.
- Weed Control: Fewer weeds pop up. Especially in the beginning. The straw itself doesn’t have many weed seeds.
- Faster Setup: No tilling or heavy lifting of soil.
- Better Drainage: Bales allow water to drain away. This is good for plant roots.
- Soil Improvement: The decomposed straw enriches your garden soil over time.
- Mobility: You can move bales (though it’s heavy work!). This is great for renters.
Disadvantages
- Cost: New bales can add up. Especially for a large garden.
- Water Needs: Bales dry out faster than soil. They need regular watering.
- Nutrient Leaching: Nutrients can wash out with heavy rain. So, consistent feeding is key.
- Short Lifespan: Bales decompose. You’ll need to replace them or amend them each year.
- Pests: Some small critters might find the bales cozy. Though I haven’t had major issues.
Straw Bale Gardening vs. Traditional Raised Beds
Both methods offer benefits. But they are quite different. I’ve used both.
Each has its place.
| Feature | Straw Bale Gardening (Joel Karsten) | Traditional Raised Beds |
|---|---|---|
| Initial Cost | Moderate (bales) | Higher (lumber, soil, delivery) |
| Setup Effort | Low (activate bales) | High (build, fill with soil) |
| Soil Prep | Minimal | Significant internal preparation |
| Weed Pressure | Low, especially year 1 | Variable, often higher than bales |
| Lifespan | 1-2 years | Many years (structure lasts) |
| Soil Health | Improves surrounding soil over time | Depends on soil quality used to fill |
| Mobility | Possible (bales) | Fixed structure |
Traditional raised beds are a long-term investment. They are permanent structures. You fill them with soil and compost.
They last for many years. Straw bale gardens are more of a temporary solution. They are built directly on the ground.
They break down and become part of your garden soil over time. It’s a different philosophy. One is about structure, the other is about organic cycles.
Tips for Success with Straw Bale Gardening
I’ve learned a few things. These helped me get the best harvests from my straw bales.
- Feed them regularly. Don’t just water. Add a balanced liquid fertilizer every few weeks. Or use a slow-release granular one. Your plants will thank you.
- Monitor moisture. Stick your finger into the bale. If it feels dry an inch down, water it well. Overwatering is possible, but drying out is more common.
- Don’t overcrowd. Give plants enough space to grow. This ensures better air circulation. And prevents disease.
- Mulch the tops. After planting, a layer of compost or straw can help retain moisture. It also looks neater.
- Consider companion planting. Just like regular gardens, some plants help each other. Learn about good pairings.
Learn more about vegetable gardening.
Frequently Asked Questions
Will bugs infest my straw bales?
Some small insects might use them for shelter. But usually not a major problem. Keep plants healthy to resist pests.
Learn more about gardening for beginners.
How long do straw bales last?
They typically last one to two growing seasons. They break down over time. Learn more about organic gardening.
Can I plant potatoes in straw bales?
Yes, you can! Bury the seed potatoes a few inches deep. Add straw as the plants grow.
Learn more about square foot gardening.
Is straw bale gardening good for my soil?
Absolutely! Decomposed straw adds rich organic matter. It improves soil structure and fertility.
Learn more about gardening tips.
Do I need special tools for straw bale gardening?
No. Basic gardening tools like a trowel, watering can, and shovel are usually enough. Learn more about gardening success.