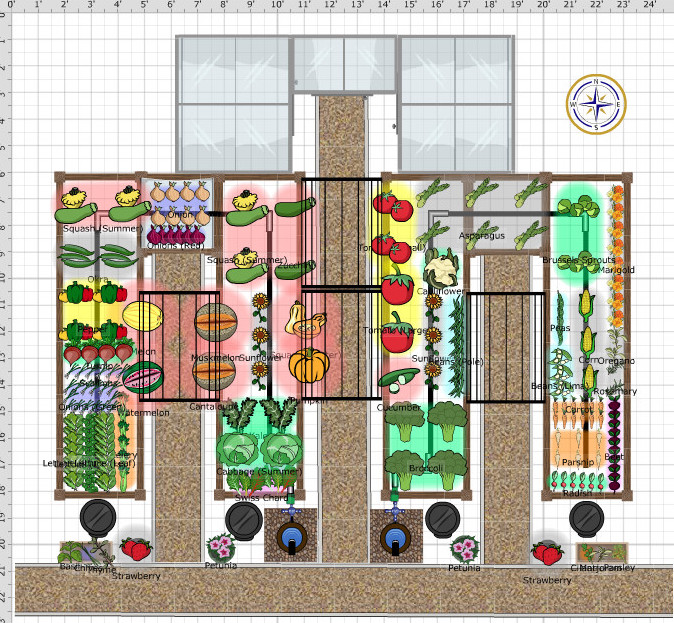
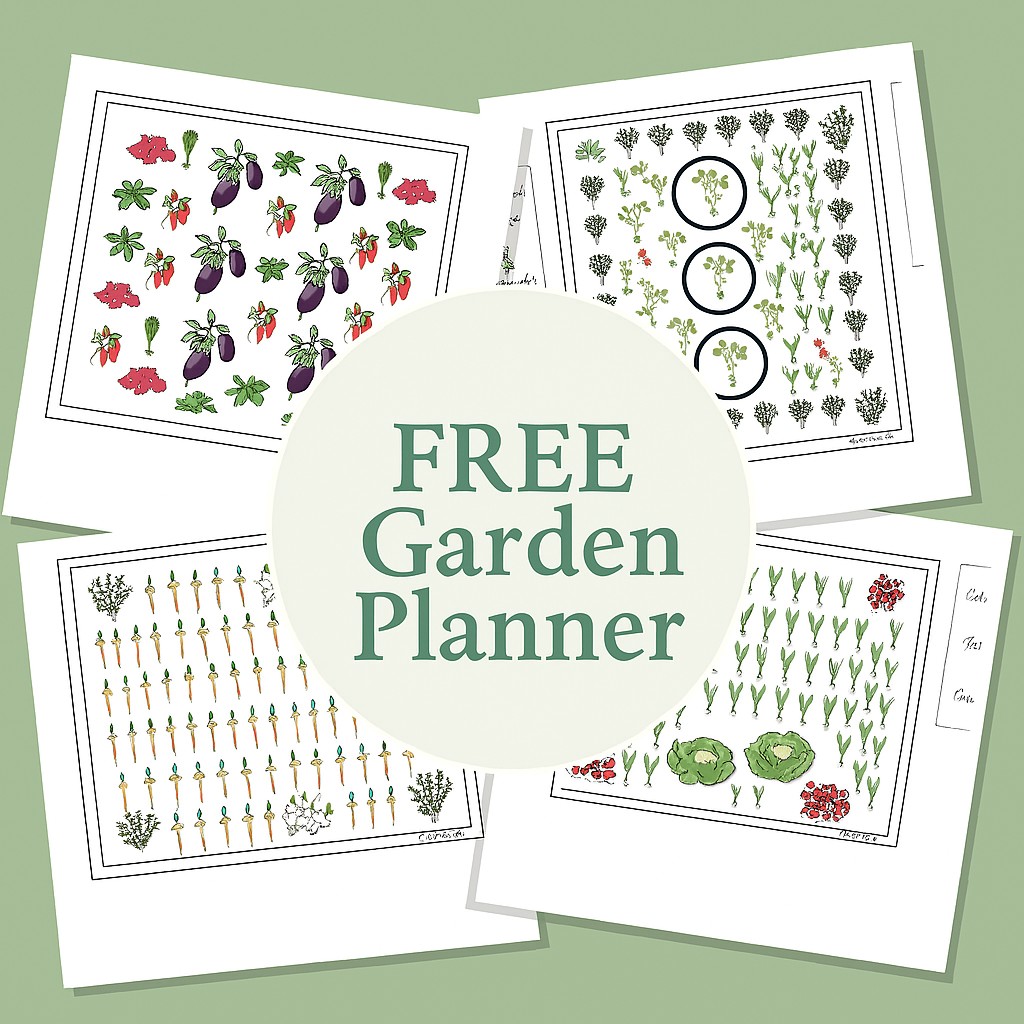
A free raised garden bed layout planner helps you map your garden, place each crop, set plant spacing, and plan walking paths before you buy seeds or fill your beds with soil. You can use an online garden planner, a spreadsheet, or graph paper to make a clear planting plan that fits your yard, budget, and growing zone.
Planning a raised bed garden in the United States starts with a few simple choices. You need to know how much sun your yard gets, how much room you have, and which vegetables grow well in your USDA hardiness zone and local climate. A plan can save space, cut down on waste, and help you avoid planting too many crops in one small bed.
You do not need paid software to get started. A free online tool can help you draw beds and place crops, while graph paper gives you full control over each square. The best method depends on how many beds you have, whether you want automatic spacing help, and how much detail you need. This guide explains how to choose a planner, build a useful layout, and adjust it for real growing conditions.
Source: i.pinimg.com
What Is a Free Raised Garden Bed Layout Planner?
A raised garden bed layout planner is a tool that helps you arrange growing beds, vegetables, herbs, flowers, and paths before planting. A free version may offer a simple drawing grid, a list of crops, bed shapes, or a way to save your plan. Some tools also include planting calendars and suggested spacing, though the features vary by provider.
The word free can mean different things. One planner may offer all its basic tools without charge, while another may limit saved plans, crop lists, or advanced features. Check the current terms before spending time on a detailed design. You can also make a useful plan with graph paper and a pencil at no cost.
For most home gardeners, the main goal is practical. You want to know where each bed will go, which plants will fit, and how to reach them without stepping on the soil. A clear plan also makes it easier to buy the right amount of lumber, soil, seeds, and seedlings.
Source: craft.camp
Bed placement
Map the growing area and leave enough room for paths, watering, and harvest work.
Crop spacing
Assign room for mature plants rather than counting only the seedlings that fit today.
Seasonal planning
Track spring, summer, and fall crops so empty spaces can be replanted when the weather allows.
Who Should Use a Garden Layout Planner?
A planner can help first-time gardeners who are unsure where to start, as well as experienced growers who manage several beds. It is useful for small suburban yards, patios, community garden plots, and larger home vegetable gardens. Renters can use a simple plan to arrange portable beds or containers without changing the whole yard.
If you grow just a few herbs in one small box, a hand-drawn sketch may be enough. If you manage several beds and grow crops in different seasons, an online tool or spreadsheet can make changes easier.
Best for beginners
Start with one bed, a short crop list, and a basic grid.
Best for larger gardens
Use a digital plan to track bed sizes, crop families, planting dates, and yearly changes.
Where to Find a Free Raised Garden Bed Layout Planner
You can start with an online garden planning tool, a spreadsheet, or a paper grid. Each option has different strengths, so choose the one that solves your main problem rather than the one with the most features. Before choosing a website, confirm that its current free plan lets you create the type of layout you need.
Online tools are helpful when you want to move crops around, change bed dimensions, or save more than one design. Paper and spreadsheet plans offer more control over custom measurements and do not depend on a garden planner’s crop library. Neither method can replace local planting guidance or the instructions on seed packets.
Source: i.pinimg.com
Online garden planners
Look for a bed editor, crop placement tools, plant spacing details, and the ability to save or print a plan. Review account requirements and free-plan limits first.
Google Sheets or another spreadsheet
Create a grid, assign each cell a measurement, and label every crop. Color coding can help you separate plant families or growing seasons.
Graph paper
Draw beds to scale and write crop names in each space. This method works well when you want a simple plan without a login or subscription.
A garden journal
Keep your layout beside notes about sowing dates, harvests, pest problems, and changes for next year.
How to Compare Free Planner Features
Test the basic tasks before you build your full garden. Try drawing one bed, placing a few crops, changing their positions, and saving or printing the result. If the tool cannot do these tasks without a paid upgrade, decide whether a simpler method would be easier.
Do not assume that every planner knows your local weather or gives accurate spacing for every variety. A digital crop icon is a planning aid. Check plant labels, seed packets, and local extension guidance before you plant.
Check bed dimensions
Make sure the tool accepts the length and width of your real bed.
Check plant information
Look for mature size, spacing, sunlight needs, and growing season details.
Check export options
Confirm whether you can print, download, or save the layout without paying.
Measure Your Garden Before Drawing the Layout
Start with the real space in your yard. Measure the available length and width, then mark walls, fences, trees, gates, taps, and other fixed features on your sketch. Include paths and room to move a wheelbarrow if you use one. A plan that ignores access can look neat on screen but feel cramped once the beds are built.
Next, check the sun. Many common fruiting crops, such as tomatoes, peppers, cucumbers, and squash, grow best with about six to eight hours of direct sunlight a day. Leafy greens can often cope with less, though their needs vary by crop and climate. Watch the area at different times of day, since a fence or tree may cast a long shadow.
Water access matters too. A bed near a hose or rainwater collection system may be easier to maintain than one at the far end of the yard. Check drainage after rain and avoid placing beds where water regularly pools. If the ground is sloped, consider how runoff may affect the bed and paths.
Source: i.pinimg.com
Measure the whole area
Record the available garden dimensions before choosing bed sizes.
Mark fixed features
Include trees, structures, fences, utility access, and any areas that must remain clear.
Track sunlight
Note which areas receive full sun and which stay shaded during the day.
Plan water access
Place beds where you can water them without dragging a hose across every path.
Choose a Bed Size You Can Reach
A bed that is too wide can make planting and weeding hard. A common width for a bed reached from both sides is about four feet, but your reach may call for a narrower design. Beds against a wall or fence should usually be narrow enough to reach from the open side.
Length depends on your space and how you plan to work. An eight-foot bed can be a useful starting point, but it is not a rule. Several short beds may be easier to manage than one long bed, especially if you want to rotate crops or keep different soil mixes apart.
Reach from both sides
Choose a width that lets you tend the center without stepping into the bed.
Reach from one side
Make the bed narrower so you can tend the far edge without leaning too far.
How to Make a Raised Garden Bed Layout Step by Step
Once you know your space, build the plan in a clear order. Start with the outside dimensions, add paths, and then place the crops. This keeps the design tied to the space you really have instead of forcing the yard to fit a drawing.
For a simple digital plan, use a grid where each square represents a fixed area. For example, one square might represent one square foot. Label the dimensions so you remember the scale. If you use graph paper, write the scale in a corner before you start adding plants.
Source: gardenplanner.blob.core.windows.net
Step 1: Draw the garden boundary
Add the yard’s length and width, then mark fences, walls, trees, water access, and shaded areas.
Step 2: Add each raised bed
Enter the measured dimensions and leave enough room between beds for safe access.
Step 3: List the crops you want
Write down vegetables, herbs, and flowers you plan to grow, including how much your household can use.
Step 4: Check plant spacing
Use the seed packet or plant label to find the recommended distance between plants and rows.
Step 5: Place tall crops
Put trellised or tall plants where they will not block sunlight from shorter crops. In many US gardens, the north side is a useful starting point, but check the actual sun path and any nearby shade.
Step 6: Add low-growing crops
Place lettuce, radishes, and other short crops in suitable sunny spaces where taller plants will not crowd them.
Step 7: Save a copy
Print or save the layout and leave room for notes about dates, harvests, and changes.
Use a Simple Grid for a 4-by-8-Foot Bed
A four-by-eight-foot raised bed has 32 square feet of growing area before you account for any structures or spaces inside the bed. You can divide the area into 32 one-foot squares for a basic planning grid. However, each square is only a drawing unit. It does not mean every crop can grow in one square.
A large tomato plant may need much more space than a small radish or a group of carrots. A trellised cucumber may grow upward, but its roots and leaves still need room. Use the grid to track space, then adjust the crop count to match the recommended spacing and growth habit.
Example calculation
Four feet multiplied by eight feet equals 32 square feet. This is the bed’s surface area, not a promise that 32 full-size plants will fit.
Leave access space
Keep the paths outside the bed in the full garden plan so the growing area does not get counted twice.
Plan Plant Spacing and Crop Placement
Plant spacing is one of the most useful parts of a raised bed layout. A bed can look full on planting day and become crowded a few weeks later. Use the final plant size, not the size of the seedling, to work out how many crops can fit.
Seed packets and nursery labels often provide spacing guidance. Follow those instructions for the variety you have, then adjust for the growing conditions in your yard. Crowded plants can compete for light, water, and nutrients, while overly wide spacing can leave unused ground that might suit a quick crop or low-growing herb.
Also consider how you will reach the harvest. A trellis can help keep climbing crops off the ground, but it must be stable enough for the mature plant. Keep spreading squash and similar crops near an edge where their vines can extend outside the bed if there is room and they will not block a path.
Source: gardenplanner.blob.core.windows.net
Tomatoes
Allow space based on the variety and whether plants are staked, caged, or allowed to spread.
Carrots and radishes
Use the row or plant spacing on the packet and thin seedlings as directed.
Lettuce
Choose spacing based on whether you plan to harvest full heads or pick young leaves.
Cucumbers and pole beans
Plan a suitable trellis and leave room for roots, leaves, and harvest access.
Square foot gardening divides a growing bed into one-foot squares and assigns crops to each square. It can make planning easier, especially for small beds and mixed vegetables. The number of plants per square depends on crop type, variety, mature size, and the method you follow.
Do not apply one spacing rule to every crop. A small radish may fit in a much tighter pattern than a full-size broccoli plant. When a square-foot chart conflicts with the seed packet or reliable local guidance for your crop, check the reason for the difference before planting.
Use squares as a guide
Mark the planned crop count in each square and verify it against reliable spacing advice.
Avoid overcrowding
Reduce the number of plants if mature leaves or roots will compete for the same space.
Plan for Sunlight and Plant Height
Place tall plants where they are least likely to shade crops that need more sun. In many Northern Hemisphere gardens, the north side is a sensible place for tall crops, but the best position depends on buildings, fences, the season, and the direction of sunlight.
If your yard has strong afternoon heat, some leafy greens may benefit from partial shade during the hottest part of the day. Do not assume that shade is always helpful, though. Fruiting vegetables generally need ample direct sun to produce well.
Tall crops
Consider trellised beans, cucumbers, and supported tomatoes first when arranging the bed.
Low crops
Place short crops in open areas with enough light for their needs.
Choose Companion Plants and Rotate Crop Families
Companion planting means growing certain plants near one another for practical reasons, such as shared growing conditions, use of space, or support. For example, a trellis can let a climbing crop grow upward while a shorter crop uses some of the space below. The result depends on the crops and their actual needs, so do not treat every companion planting chart as a proven rule.
Keep plants with similar light and water needs together when possible. A thirsty cucumber and a drought-tolerant herb may need different care, which can make one shared bed harder to manage. The layout should make daily watering and harvest tasks easier, not create more work.
Crop rotation is another useful part of planning. If you grow vegetables in the same beds year after year, record their plant families and move crops to different beds when space allows. Rotation can help manage some pests and diseases, but it will not prevent every problem, especially when a disease survives in soil or spreads from nearby plants.
Source: i.pinimg.com
Group by care needs
Place crops with similar sunlight and watering needs together to simplify routine care.
Record plant families
Track related crops, such as tomatoes, peppers, and eggplants, so you can plan future rotations.
Use flowers with a purpose
Add suitable flowers for color, habitat, or harvest goals without crowding the main crops.
Keep a Record of Each Bed
Name each bed and save a copy of its layout at the end of the season. Add notes about crops that did well, plants that became too large, pest problems, and spaces that stayed empty. These notes help you make changes based on what actually happened in your garden.
A simple record can be more useful than a detailed plan that never gets updated. Write down what you planted, when you planted it, and whether the harvest met your needs. Use the record to guide next year’s layout rather than repeating the same design without review.
Bed history
Record crop families and the years they grew in each bed.
Season notes
Track planting dates, harvest results, pest issues, and changes worth making.
Adapt Your Layout to US Growing Zones and Seasons
A garden layout should fit your local growing season. The United States covers a wide range of climates, so a planting plan that works in Minnesota may not suit Florida, Arizona, or coastal California. USDA Plant Hardiness Zones describe average annual extreme minimum winter temperatures and help with perennial plant selection, but they do not tell you the whole story for annual vegetables.
For vegetable planting dates, check your local last and first frost dates, soil conditions, and regional extension guidance. Heat, humidity, rainfall, day length, and the length of the frost-free season can all affect the crops you can grow. A planner may provide general dates, but local information should guide your final schedule.
Gardeners in colder regions may focus on spring and summer crops, then use row covers or fast-growing fall crops where conditions allow. In warmer areas, some cool-season vegetables grow best in fall or winter rather than during peak summer heat. Adjust the calendar to your region instead of copying a plan from another state.
Source: earthsoulorganics.b-cdn.net
Check local frost dates
Use a trusted local source to estimate when tender crops can safely go outdoors.
Check crop-specific needs
Review days to maturity, temperature preferences, and direct-sowing or transplant instructions.
Plan succession crops
Leave space for another crop when an early harvest finishes and the season permits.
Use Local Extension Resources
US land-grant university extension services often publish regional vegetable planting guides and practical gardening advice. These resources can help you confirm sowing dates, spacing, pest management steps, and crop varieties suited to your area.
If your online planner gives a planting date that conflicts with local advice, check the crop, region, and conditions behind both recommendations. A date that works in a mild coastal climate may be too early in an inland area with late spring frosts.
Use information for your region and crop rather than a broad national calendar alone.
Common Layout Mistakes and How to Fix Them
A useful garden plan accounts for the problems that appear after planting. The most common mistakes are overcrowding, blocked paths, poor sunlight, and beds placed too far from water. You can prevent many of these issues by reviewing the drawing before building or buying supplies.
Do not fill every open square just because the planner leaves room for another plant. Empty space can be useful for mature leaves, airflow, easy harvest, or a later crop. A slightly less crowded bed may be easier to water and maintain than a layout that looks full from the start.
Also check the materials and site before building. Avoid wood treated with chemicals that are not approved for the intended garden use, and check local guidance before reusing unknown scrap materials. If you plan to build a tall or unusually large bed, consider the weight of wet soil, the strength of the sides, and whether the site needs a stable base.
Source: lawnmowerfixed.com
Mistake: Plants are too close
Fix the layout by using mature plant spacing and reducing the crop count where needed.
Mistake: Paths are too narrow
Widen the access space so you can carry tools, water plants, and harvest without stepping on the bed.
Mistake: Tall plants block sunlight
Move tall crops or trellises after checking the sun path and the light needs of nearby plants.
Mistake: Water does not drain well
Check the site, bed design, and soil mix. Correct drainage issues before planting crops that dislike wet roots.
Mistake: The plan cannot be reused
Save a dated copy and add notes so next season’s plan reflects actual results.
Check the Soil and Site Before Planting
Raised beds give you more control over the growing mix, but they still need sound drainage and a suitable location. Use a soil mix intended for raised beds or follow a reliable local recipe suited to your materials and crops. Do not assume that filling a bed with pure compost will provide the right balance of water retention, air, and nutrients.
If you plan to place a bed over existing soil, consider the quality of that soil and whether roots can grow into it. If the site may have contamination from past industrial use, old paint, or other sources, seek local soil testing guidance before growing food. A raised bed does not automatically remove every contamination risk, especially if roots can reach the soil below.
Review drainage
Make sure water can move through the growing mix and does not collect around the bed.
Choose suitable materials
Use materials intended for garden construction and verify the safety of reclaimed materials before growing edible crops.
A Practical Example for a Small Backyard Garden
Suppose you have a sunny backyard corner that can fit two raised beds, each measuring four feet by eight feet. You want tomatoes, lettuce, carrots, cucumbers, and herbs for regular home meals. A useful plan starts by giving each crop the right space, then placing the beds so you can reach them from the paths.
You might reserve one bed for tomatoes, herbs, and a few short-season crops, while the other holds trellised cucumbers, carrots, and lettuce. The exact crop count depends on variety, spacing, trellis position, and local growing conditions. This is a sample design idea, not a fixed planting prescription.
Use your planner to draw both beds and label the planned locations. Mark the trellis, watering point, and walking route. Then check the crop spacing on each packet and adjust the drawing until the mature plants have enough room.
Source: i.pinimg.com
Bed A: Fruiting crops
Place tomatoes with their supports and leave enough room to reach the fruit. Add a modest number of compatible herbs where light and spacing permit.
Bed B: Roots and climbing crops
Place a trellis along a suitable edge, then arrange carrots and lettuce in the remaining areas according to their spacing and light needs.
Outside the beds
Keep paths clear and place tools or a watering can where they are easy to reach.
Turn the Plan Into a Shopping List
Once the layout is stable, list the supplies you need. Include bed materials, fasteners suited to the construction, soil mix, compost if needed, seeds or seedlings, plant supports, and watering supplies. Check what you already own before buying new items.
Estimate the growing area by multiplying the length by the width of each bed. If you need to buy soil by volume, multiply the bed’s length, width, and fill depth using the same units. Convert the result to the units used by your supplier and allow for settling without overfilling the bed.
Example soil calculation
A four-foot-by-eight-foot bed filled to a depth of one foot holds 32 cubic feet of material before settling. A shallower fill needs less material.
Review before buying
Confirm the bed dimensions, fill depth, crop count, and support needs before placing an order.
How to Tell Whether Your Garden Plan Is Ready
Your layout is ready when every bed has a clear size, every crop has a suitable place, and you can reach the growing area without walking on the soil. You should also know where water will come from, how tall plants will be supported, and which local planting dates you need to check.
Review the plan from the viewpoint of a normal gardening day. Imagine carrying a basket, watering each bed, pulling weeds, and reaching the center of every planting area. If a path is blocked or a trellis makes harvest difficult, change the drawing before you build.
Finally, save the layout with a date and a crop list. Leave space for notes about what changes during the season. A garden plan should be easy to update, because weather, pests, plant growth, and your own food needs can all change the best use of a bed.
Source: i.pinimg.com
Space check
All crops fit according to suitable mature spacing, and paths remain clear.
Sun and water check
The layout reflects the real sun pattern and gives you practical access to water.
Season check
Planting dates and crop choices match local conditions and the expected growing season.
Budget check
The supply list matches the final measurements and avoids unnecessary purchases.
What to Do If Your First Plan Does Not Work
If the layout feels crowded on paper, reduce the number of plants before buying supplies. If the bed does not fit the yard, shorten it or split it into two smaller beds. If the sunlight is limited, choose crops that suit the available light rather than forcing sun-loving vegetables into a shaded space.
When a crop fails during the season, record the likely cause before changing the whole garden. Poor germination, drought, excess water, pests, heat, and unsuitable planting dates can produce similar-looking problems. Use local extension resources to narrow down the cause and adjust the next planting.
Revise one issue at a time
Change spacing, location, watering, or planting time based on the problem you observed.
Keep useful records
Save the original plan and note what changed so you can compare results next season.
Frequently Asked Questions
Q
What is the best free raised garden bed layout planner?
The best free planner is the one that lets you draw your bed dimensions, place crops, check spacing, and save a copy without features you do not need. An online garden planner may be useful for several beds, while graph paper or a spreadsheet may work better for a simple custom design. Check current free-plan limits before choosing an online tool.
Q
Can I plan a raised garden bed without an app?
Yes. Draw your bed to scale on graph paper or create a grid in a spreadsheet. Mark the dimensions, paths, tall plants, and crop locations. Use seed packet spacing and local planting guidance to check the plan before you buy supplies.
Q
How many vegetables can fit in a 4-by-8-foot raised bed?
A four-by-eight-foot bed has 32 square feet of surface area, but the number of plants depends on the crops and their mature size. Small crops such as radishes may fit in tighter patterns than tomatoes, broccoli, or squash. Follow the spacing for your chosen varieties rather than filling all 32 square feet with the same plant count.
Q
Should raised garden beds run north to south or east to west?
Neither direction is best for every site. A north-to-south arrangement can help spread sunlight across rows in some settings, while an east-to-west layout may work better with the yard’s shape or slope. Consider the sun path, nearby shade, tall crops, drainage, and access before choosing a direction.
Q
How much space should I leave between raised garden beds?
Leave enough space to reach the beds, carry tools, and move comfortably without stepping into the growing soil. A narrow path may work for hand care, while a path used for a wheelbarrow needs more width. Measure the tools and equipment you use, then draw the paths at their actual planned size.
Q
Does a garden planner tell me when to plant vegetables?
Some planners offer planting calendars, but their dates may be general or depend on the location settings available. Check your local frost dates, crop instructions, and university extension guidance before planting. USDA Plant Hardiness Zones help with perennial plant selection but do not provide a complete vegetable planting calendar.
✦ Wrapping Up
Conclusion
A free raised garden bed layout planner can help you turn a rough backyard idea into a clear planting plan. Choose an online tool, spreadsheet, or paper grid, then add the real bed dimensions, paths, sunlight, and water access. Place crops according to their mature size and care needs instead of filling every open space.
Before building, review local planting dates, soil needs, bed materials, and your supply list. Save the final layout and keep notes throughout the growing season. Those records will make next year’s garden easier to plan and help you use each bed in a way that fits your space and your household.
💡 Key Takeaway
Measure your garden today, sketch the beds and paths, and choose the crops you actually want to eat. Use a free grid or online planner to place each crop, verify spacing with reliable growing guidance, and save a copy before buying materials or planting.