A good garden bed plant layout groups plants by sunlight, mature size, water needs, and harvest time. Place tall crops where they will not shade short ones, leave enough room for roots and leaves, and keep every bed easy to reach.
Across the United States, home gardeners work with many kinds of spaces. A sunny backyard in Texas has different needs from a small patio in Ohio or a cool coastal yard in Maine. Yet the same basic rules help in most gardens. A clear planting plan makes better use of space, helps plants get enough light, and makes daily care less of a chore.
Start by measuring your bed and watching how sunlight moves across it. Check your local frost dates, soil, and growing season before you choose crops. Then group plants that need similar care. You do not need a large yard or a costly setup. Even one raised bed can grow a useful mix of greens, herbs, roots, and fruiting crops when each plant has enough room.
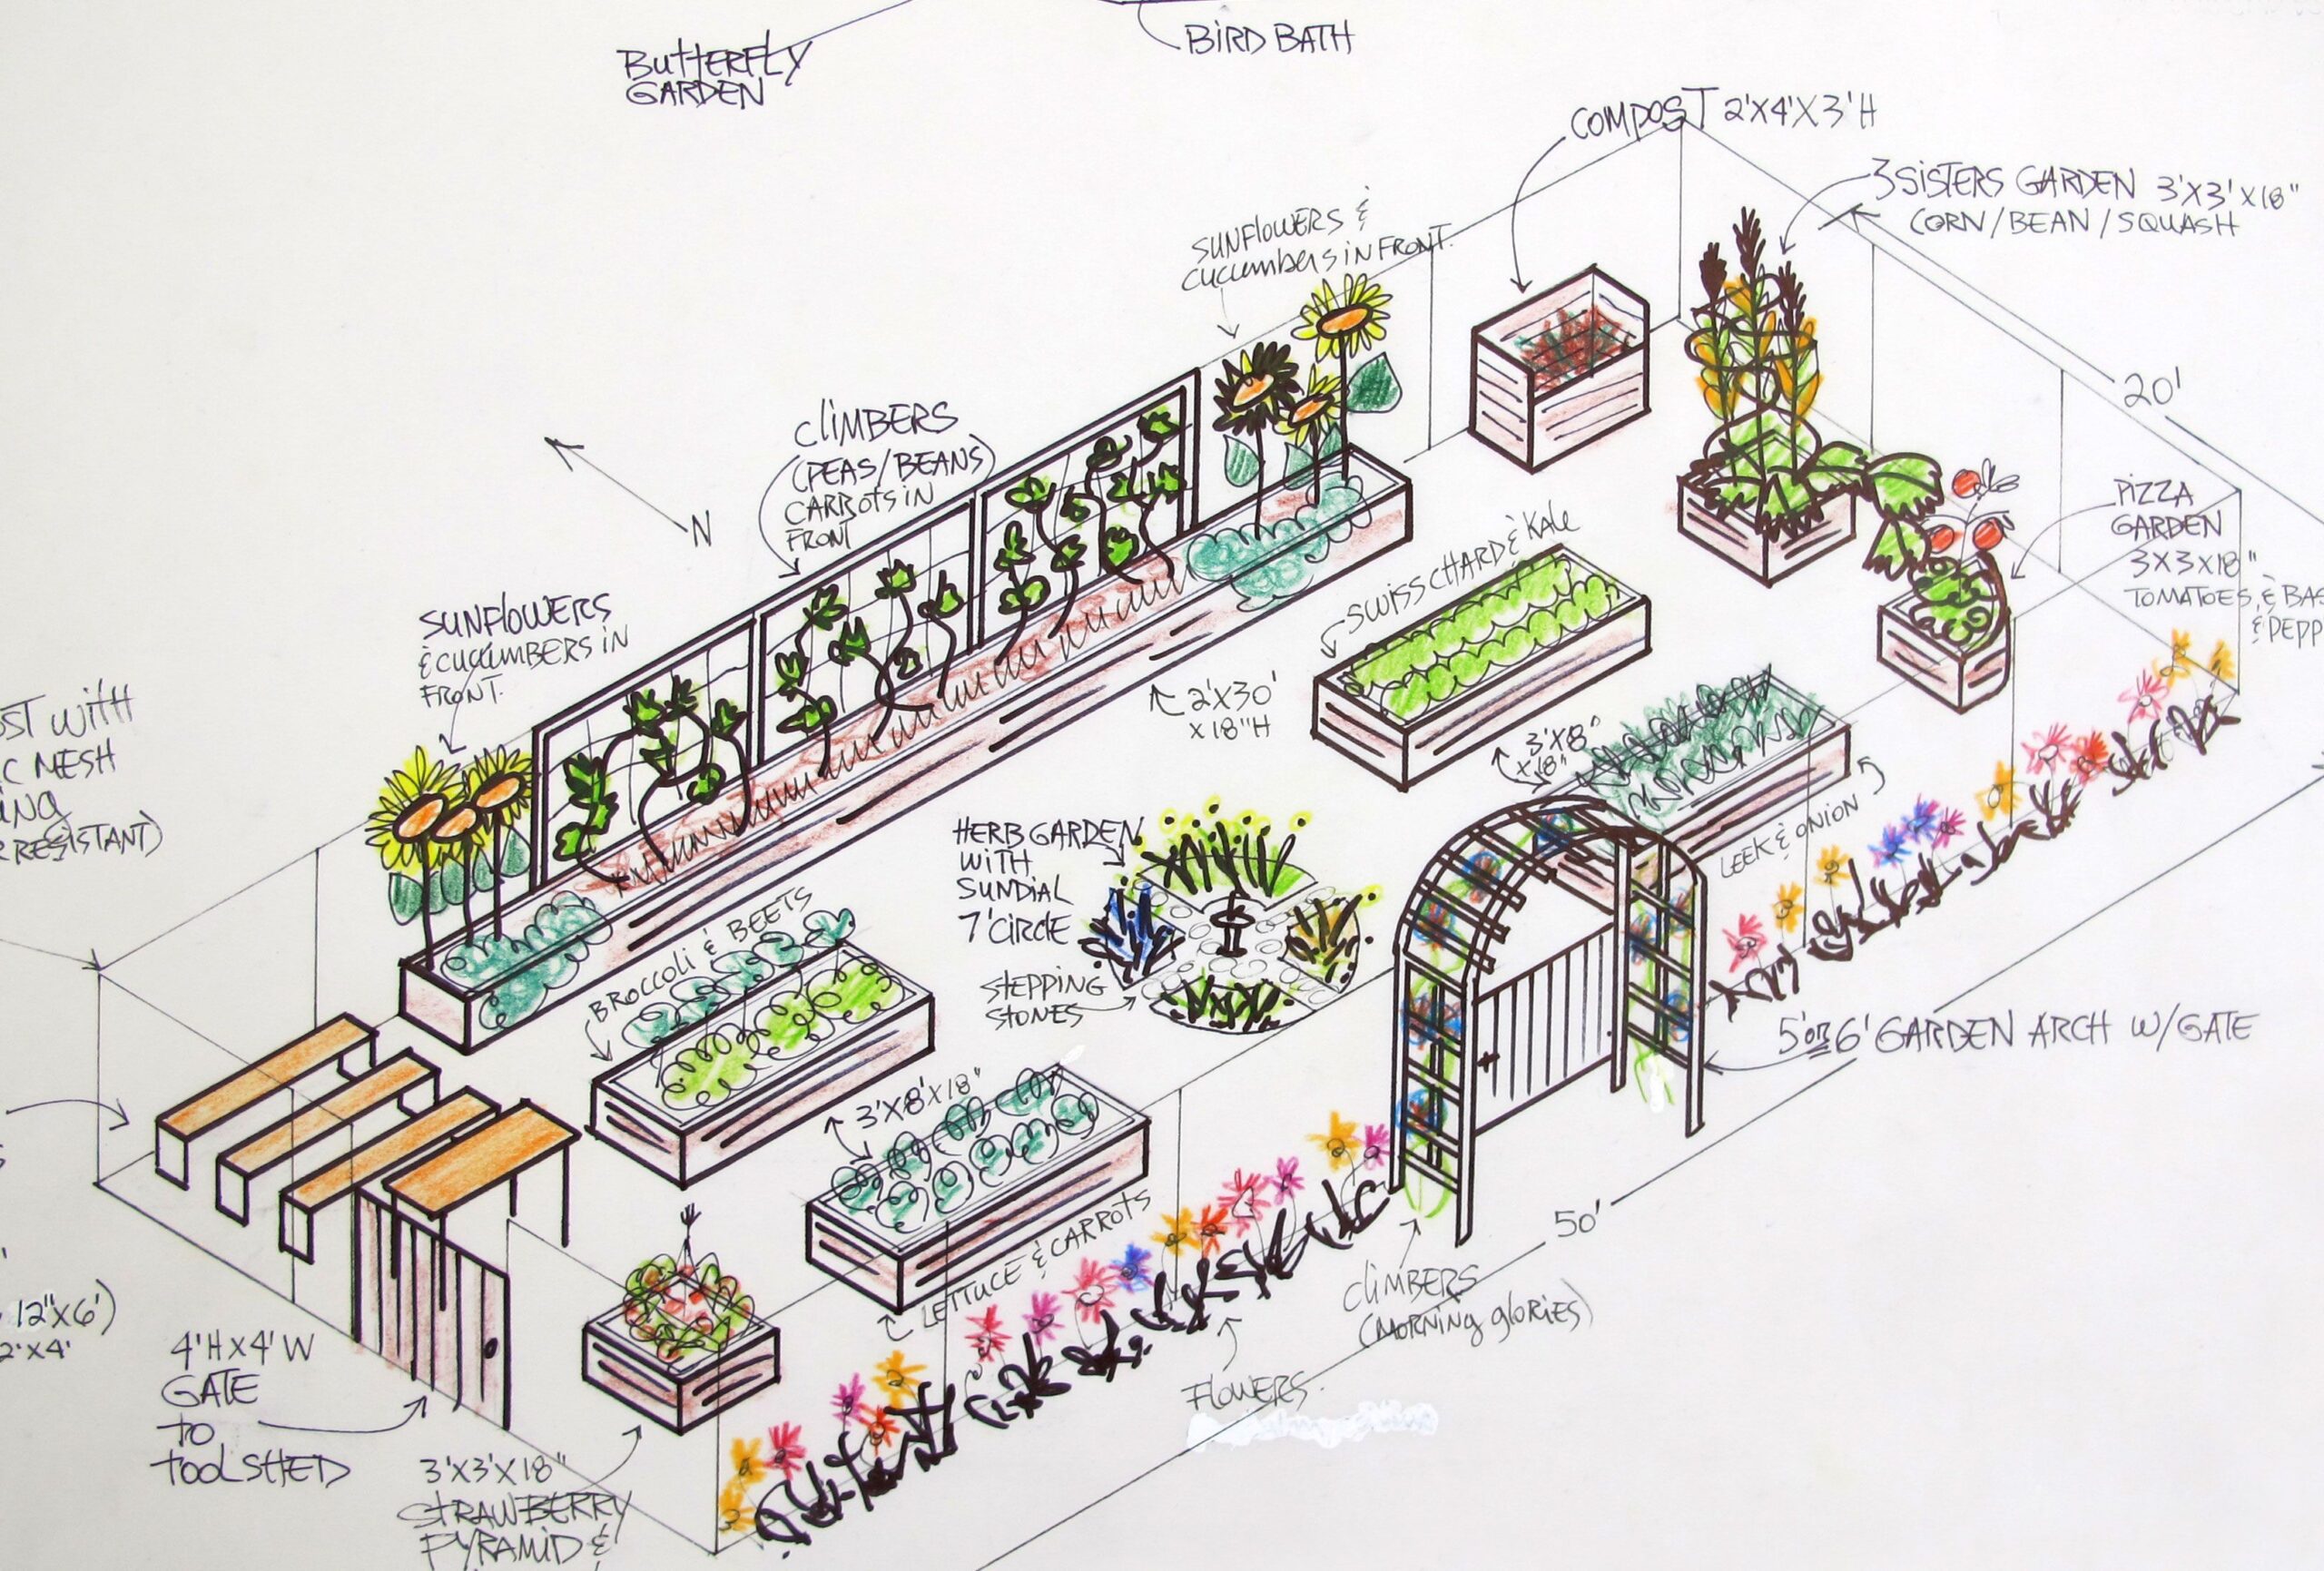
Source: howcanthis.com
Understand What Makes a Good Garden Bed Plant Layout
A garden bed plant layout is a plan that shows where each crop will grow. It accounts for plant height, width, root space, sunlight, water, and access. The goal is not to fit the largest number of plants into one bed. The goal is to grow healthy plants that are easy to tend and harvest.
A useful plan starts with the space you have. Measure the length and width of the bed. Note fences, walls, trees, and nearby buildings that may block light. Also check whether the bed drains well after rain. These details can change which crops will thrive and where each one should go.
Next, list the crops you actually want to eat or grow. A family that cooks with tomatoes, peppers, and basil may need a different plan from someone who wants salads and fresh herbs. Choose a manageable mix first. You can add more crops in later seasons as you learn how the bed performs.
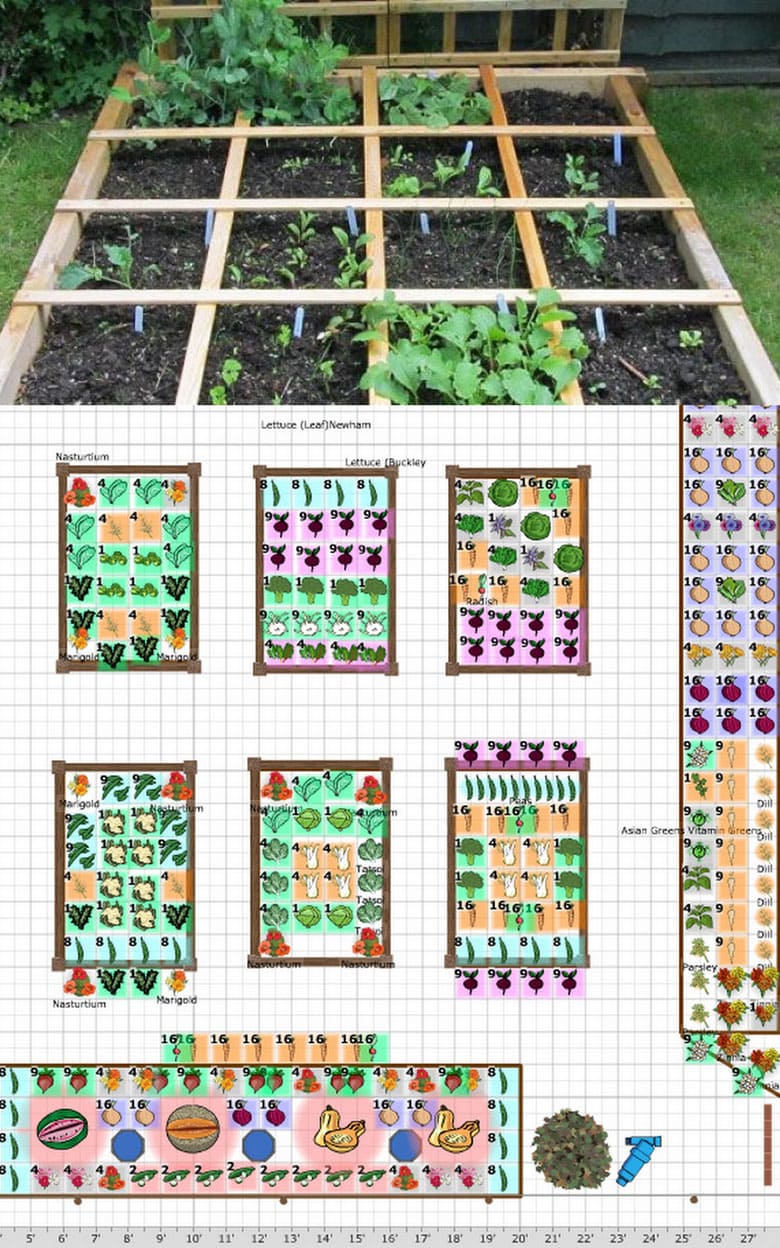
Source: exoshlpnk.blob.core.windows.net
Sunlight
Many fruiting crops, such as tomatoes, peppers, and cucumbers, grow best with about six to eight hours of direct sun. Leafy crops often tolerate some shade, depending on the variety and local heat.
Plant size
Check the expected mature height and width of every crop. A small seedling can grow into a broad plant that shades or crowds its neighbors.
Water needs
Keep crops with similar moisture needs together where possible. This makes watering easier and reduces the chance of overwatering one plant to meet another plant’s needs.
Easy access
Leave room to reach plants, pick ripe produce, pull weeds, and check for pests without stepping on the growing soil.
Choose the Right Bed Size
A 4-by-4-foot raised bed is a useful starting point for a small home garden. It offers 16 square feet of growing space and can support several crops when their mature sizes fit the plan. A bed that is about 3 to 4 feet wide is often easier to tend from both sides than a wider bed.
If you can reach a bed from only one side, keep it narrower. You should be able to reach the center without leaning heavily on the soil. For a long bed, plan a clear path along each side if space allows. Safe access matters more than using every inch for plants.
Try one compact raised bed or several containers near a sunny door.
For larger yards
Use separate beds for crops with different care needs, such as salad greens, tomatoes, and root vegetables.
Plan Plant Placement Around Sunlight
Sunlight should guide the first draft of your garden bed plant layout. Most vegetables need direct light to grow well, but the amount varies by crop. Tomatoes, squash, cucumbers, and peppers tend to need plenty of sun. Lettuce, spinach, and some herbs can grow with less direct light, especially where afternoon heat is intense.
In many gardens in the United States, placing tall plants along the north side of a bed helps limit shade on shorter crops. This rule works best when the bed receives strong sun from the south. If your bed faces a wall, sits beneath trees, or gets shade from a nearby building, observe the actual light pattern before deciding.
Do not rely on one quick look at noon. Sun moves across the sky, and a spot that looks bright at midday may be shaded for much of the morning. Watch the bed at different times of day or record the hours of direct sunlight over a clear day. Repeat the check if trees or buildings create changing shade.
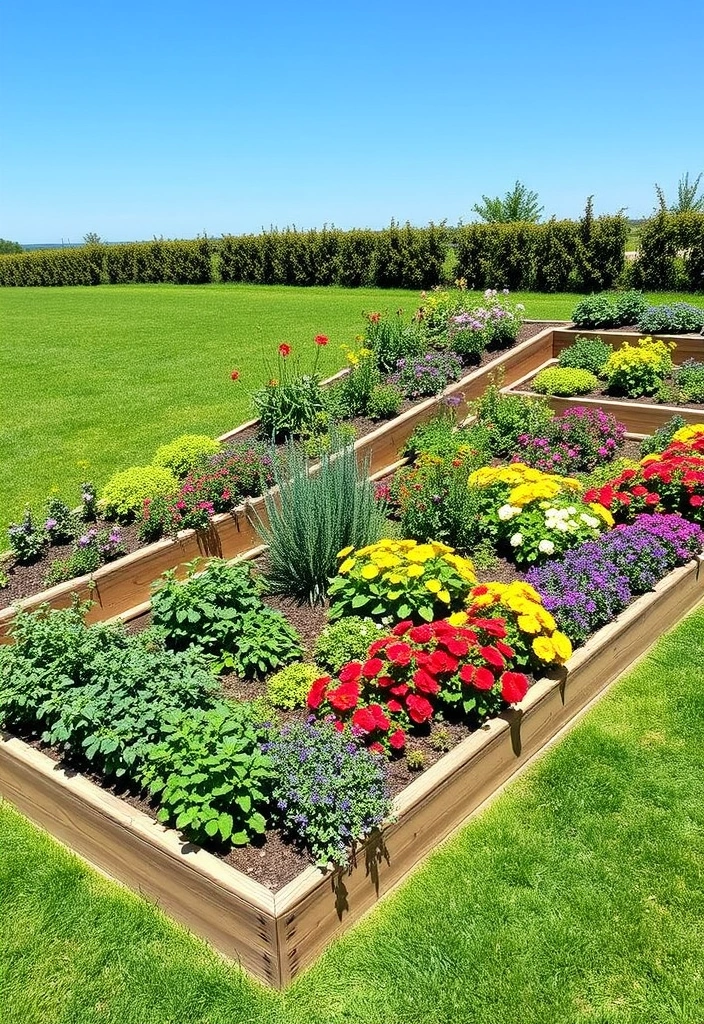
Source: gionuoovg.blob.core.windows.net
North side
Consider tall crops such as trellised cucumbers or indeterminate tomatoes, provided their height and support will not block other beds.
Middle section
Place medium-height crops such as peppers, bush beans, or compact herbs where they receive enough light.
South side
Use the sunniest front edge for low crops such as lettuce, radishes, and compact flowers.
Adjust for Hot and Cool Regions
Gardeners in hot parts of the South and Southwest may need some afternoon shade for lettuce and other cool-season crops. In these areas, a layout that gives every plant full afternoon sun may lead to stress, bolting, or dry soil. Use taller plants or a shade cloth only when they provide suitable, controlled shade without blocking the light needed by sun-loving crops.
In cooler northern areas, full sun can help warm the bed and support crops with a long growing season. Still, local frost dates matter. A crop that grows well in one part of the country may need an earlier start, a short-season variety, or protection in another region.
Cool-season crops
Plant crops such as lettuce, peas, and spinach during suitable cool weather for your region.
Warm-season crops
Wait until frost danger has passed and soil conditions suit crops such as tomatoes, peppers, and beans.
Use Plant Spacing to Prevent Crowding
Plant spacing decides how much room each crop gets to spread its roots, leaves, and stems. Plants placed too close may compete for light, water, and nutrients. Dense growth can also limit airflow and make it harder to inspect leaves for pests or disease. A bed may look full at planting time, but the mature plants need space too.
Read the seed packet or plant tag for the recommended spacing. Use that guidance as your starting point because the right distance depends on the crop and variety. Compact bush beans need less room than sprawling squash. A determinate tomato also grows differently from an indeterminate type that continues to grow and needs a tall support.
Square-foot gardening can help you plan small beds, but it should not replace crop-specific instructions. This method divides the bed into one-foot squares and assigns plants according to their expected size. Some small crops fit several plants in a square, while large crops may need a full square or more. Follow the needs of the variety you choose.
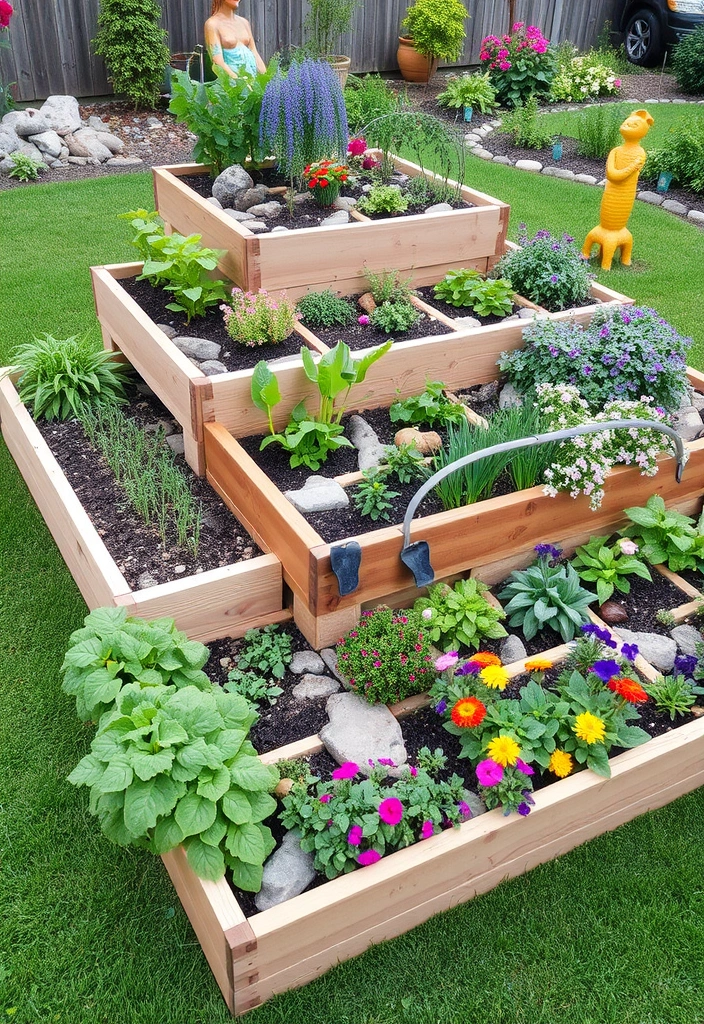
Source: gardeninglatest.com
Leafy greens
Leaf lettuce can grow in close groups when the chosen variety and harvest plan allow it. Thin seedlings or harvest baby leaves as needed.
Root crops
Carrots and radishes need suitable spacing so roots can form. Thin seedlings according to the packet directions.
Large fruiting crops
Tomatoes, squash, and some cucumbers need wider spacing or vertical supports. Do not squeeze them into small gaps meant for compact plants.
Herbs
Basil, parsley, and cilantro can fit around larger crops when their light, moisture, and mature size needs match the available space.
Example of a 4-by-4-Foot Raised Bed
Imagine a 4-by-4-foot bed in a sunny backyard. You want salad greens, radishes, carrots, basil, and one compact tomato plant. A simple sketch can show the tomato near a support on the north side, with the greens and roots in smaller blocks and basil near the front edge. The exact number of plants depends on the varieties and their spacing instructions.
Mark the bed into one-foot squares with string or a garden grid if it helps you visualize the plan. Write each crop name inside the area where it will grow. Check whether any mature plant will spill into a neighboring square or block access. If the tomato takes up more room than expected, reduce the number of other crops rather than crowding them.
North row
Reserve space for the tomato support or another tall crop that fits the bed.
Center squares
Group carrots, radishes, or greens according to their seed packet spacing.
Front edge
Use compact herbs or low greens that are easy to harvest from the path.
Group Crops by Water and Soil Needs
A practical garden layout groups plants that need similar care. This makes it easier to water the bed without leaving one crop too wet or another too dry. It also helps you choose soil amendments based on a shared growing area rather than trying to manage many different conditions in one small space.
Most common vegetables grow well in fertile, well-drained soil with enough organic matter. However, individual crops differ in their preferred soil conditions and feeding needs. Leafy greens, fruiting plants, and root crops may all need different care as they grow. Use local extension guidance and the crop’s growing instructions to guide soil preparation.
Avoid placing plants with very different moisture needs in the same small watering zone when you can separate them. For example, a bed of leafy greens may need more frequent moisture than a group of established herbs that tolerate drier soil. The exact need changes with weather, soil type, plant size, and whether the bed is raised or in the ground.
Source: dk.pinterest.com
Keep soil moist for greens
Check leafy crops often during warm or windy weather. Water when the upper soil begins to dry, based on the crop and local conditions.
Avoid waterlogged roots
Make sure the bed drains well. Standing water can harm many garden crops and can point to poor drainage.
Feed according to need
Use a soil test and crop-specific advice to decide whether fertilizer or other amendments are needed.
Check Soil Before Planting
A soil test can show soil pH and nutrient levels, helping you avoid adding products that your bed does not need. In the United States, many state cooperative extension services offer soil testing guidance or direct gardeners to suitable laboratories. Test results are more useful than guessing from leaf color alone.
For a new raised bed, use a suitable growing mix with good drainage and enough organic matter. Do not fill the bed with pure compost unless a trusted crop-specific recommendation supports that choice. Too much of some nutrients can harm plants or create imbalances. If you use soil from your yard, check whether it is suitable for growing food, especially in older urban areas or near sites with possible contamination.
Before planting
Check drainage, soil texture, and test results where available.
During the season
Watch plant growth and soil moisture before changing fertilizer or watering routines.
Choose Companion Plants With Care
Companion planting means growing certain plants near one another to make better use of space or support a healthy garden. Some combinations are useful because one crop grows upright while another stays low. Others attract pollinators or beneficial insects. Still, not every popular companion planting claim has strong evidence behind it.
A classic example is growing basil near tomatoes because both crops can use a sunny bed and may share some watering needs. That does not prove basil will make tomatoes taste better or keep every pest away. The most reliable reasons to combine plants are compatible growing conditions, useful space sharing, and a layout that makes care easier.
Flowers can also fit into vegetable beds when their mature size does not crowd food crops. Compact flowers may attract pollinators or other helpful insects, depending on the species and local conditions. Choose plants suited to your region and avoid allowing vigorous flowers to take over the bed.
Source: ca.pinterest.com
Tomatoes and basil
This combination can work in a sunny bed if both plants have enough room and their watering needs are met.
Carrots and leafy crops
These crops can share a bed when their spacing and harvest timing fit. Harvesting one crop may open room for the other.
Vegetables and flowers
Use compact flowers around bed edges when they do not shade or crowd vegetables.
Avoid overcrowding
A popular plant pairing is not useful if the plants compete for light, water, or root space.
Separate Crops With Different Growth Habits
Some crops spread across the ground, while others grow upright or climb a support. Give sprawling plants enough room to extend beyond their starting point, or train suitable crops vertically. Keep climbing stems secure and make sure the support can bear the mature plant and its fruit.
Do not assume that every vine belongs on a trellis. Heavy squash and melons may need strong support and careful fruit support if grown vertically. Some varieties are better suited to ground growth. Check the variety before planning a vertical layout.
Upright crops
Use supports for suitable tomatoes, pole beans, and climbing cucumbers.
Spreading crops
Give bush squash and other broad plants room to grow without blocking paths or smaller crops.
Create a Planting Plan for a Small Garden
A small garden bed can provide a steady supply of fresh food when you choose crops that fit your space and eating habits. Start with a short list rather than trying to grow every vegetable at once. Three or four well-placed crops are easier to manage than a crowded bed with many plants competing for the same light.
For a salad garden, consider leaf lettuce, radishes, spinach during suitable weather, and compact herbs. For a summer bed, consider one or two tomato or pepper plants with basil and a small patch of greens that can tolerate the local conditions. A family that uses many root vegetables may prefer a larger section for carrots and radishes.
Use succession planting to keep the bed productive. This means planting a new crop after an earlier crop is harvested. For example, radishes may finish before a slower crop needs the full space. Follow seasonal guidance for your area so the next crop has suitable temperatures and enough time to mature.
Source: pinterest.co.uk
Plan for meals
Choose crops you use often. This reduces wasted space and makes harvests more rewarding.
Mix harvest times
Combine crops that mature at different rates when their space and care needs allow it.
Leave a small gap
Do not fill every open space at the start. Room for growth and access can be more useful than one extra seedling.
Sample Layouts for Common Bed Sizes
Use the table below as a starting point, not a fixed planting prescription. The right plant count depends on variety, mature size, spacing directions, climate, and how often you want to harvest. A bed with one large tomato will hold fewer small crops than a bed devoted to greens and radishes.
A 2-by-4-foot bed
Focus on a few compact crops, such as greens, radishes, and herbs, or use the length for a narrow row of supported plants.
A 4-by-4-foot bed
Combine a small number of larger plants with sections of compact greens or roots, leaving enough room for mature growth.
A 4-by-8-foot bed
Divide the bed into crop groups, such as tomatoes with basil, a section for roots, and a section for leafy greens.
Use Crop Rotation to Protect Future Harvests
Crop rotation means changing where you grow related crops from one season to the next. It can help reduce the buildup of some crop-specific pests and diseases in garden soil. It also gives you a simple way to keep track of what grew in each bed and which plants may need similar nutrients.
For a home garden, you can group crops by plant family. Tomatoes, peppers, eggplants, and potatoes belong to the nightshade family. Cabbage, kale, broccoli, and related crops belong to the mustard family. Beans and peas belong to the legume family. Moving related crops to a different bed when possible is more useful than rotating plants only by their color or height.
Small gardens may not have enough beds for a long rotation cycle. In that case, keep a planting record, remove diseased plant material as advised for the disease, choose resistant varieties where suitable, and avoid planting the same vulnerable crop in the same spot every season when alternatives exist. Rotation helps, but it does not prevent every disease or pest.
Source: www.reddit.com
Record each bed
Write down the crops and varieties grown in each space, along with major pest or disease problems.
Rotate plant families
Move related crops to another bed when space allows and follow local guidance for persistent soilborne problems.
Remove crop debris
Handle diseased material according to local extension advice rather than placing every affected plant in a home compost pile.
Plan Beyond One Growing Season
A planting layout is easier to improve when you save the plan after harvest. Note which plants became too large, which sections dried out first, and where pests appeared. Keep track of the crops that produced well and those that did not suit the bed’s sunlight or soil.
Use those notes to change the next season’s layout. A tomato that shaded nearby greens may need a new spot. A row of carrots that grew poorly may need looser soil or better thinning. Small adjustments based on what happened in your own yard can make future plans more useful than copying a generic diagram.
Save the sketch
Label the bed size, crop names, planting dates, and supports used.
Review at harvest
Mark crowded spots, pest issues, poor drainage, and crops that were easy to tend.
Avoid Common Garden Layout Mistakes
Many planting problems start with a plan that looks good on paper but ignores mature growth. Seedlings are small, and empty soil can tempt you to add more plants. Yet a crowded bed becomes harder to water, weed, and inspect once leaves spread. Use plant labels and seed packet instructions to estimate the space each crop will need.
Another common mistake is placing a tall crop in front of a shorter one without checking the sun’s path. This can reduce the light available to plants behind it. A third mistake is ignoring access. If you must step into the bed to reach the center, you may compact the soil and damage roots.
Do not assume that all raised beds need the same watering schedule. A shallow bed in hot weather may dry faster than a deeper bed with more soil. Sandy soil can drain quickly, while heavier soil may hold water longer. Check the soil before watering and adjust to weather and plant needs.
Source: animalia-life.club
Too many plants
Thin seedlings or remove extra plants before they become crowded. Follow the recommended spacing for the crop.
Poor drainage
Improve the bed’s drainage or growing medium before planting crops that are sensitive to waterlogged roots.
No harvest access
Keep paths open and place frequently picked crops near a reachable edge.
Wrong season
Check local planting calendars and frost dates before setting out tender crops.
Unplanned supports
Install trellises and sturdy stakes before plants become large enough to be damaged during setup.
How to Fix a Crowded Bed
If your bed is already crowded, start with the largest plants and check which ones have the most urgent need for space. Thin young seedlings first. If two mature plants compete heavily, you may need to remove one or guide a suitable vine away from its neighbor. Do not pull large plants carelessly if doing so could damage nearby roots.
Next, inspect airflow and soil moisture. Water at the soil level when practical, and remove dead or diseased leaves as appropriate for the crop. Avoid heavy pruning unless the plant’s care guidance supports it. If the problem repeats next season, draw a new layout with fewer plants and wider access.
Act early
Thin seedlings while they are small and easier to remove.
Keep healthy plants
Choose which plants to retain based on health, space needs, and the harvest you want.
Follow a Simple Step-by-Step Planting Process
You can turn a blank bed into a workable planting plan in one short session. Gather a tape measure, paper, pencil, crop list, and seed packets or plant labels. If you are using a raised bed, also check the depth of the growing medium and whether the bed has good drainage.
Draw the bed to scale so the space is easy to divide. Add the direction of north, nearby shade, and any paths or supports. Then mark large crops first, followed by medium plants and small crops. Finish by checking every plant’s spacing, sunlight, and care needs before you buy seeds or transplant seedlings.
Source: storage.googleapis.com
Step 1: Measure
Record the bed’s length, width, and usable growing area. Mark paths and areas that are hard to reach.
Step 2: Observe sunlight
Check direct sun at different times of day and note nearby sources of shade.
Step 3: Choose crops
Select plants suited to your region, growing season, soil, and household needs.
Step 4: Place large plants
Mark tall or spreading crops first, including any trellis or stake they will need.
Step 5: Add smaller crops
Fit in roots, greens, herbs, and flowers only where their spacing and growing needs allow.
Step 6: Check access
Make sure you can water, weed, inspect, and harvest every part of the bed.
Step 7: Keep records
Save the final plan and update it with planting dates, harvest results, and problems you notice.
How to Tell Whether Your Layout Is Working
A useful layout lets plants grow toward their expected mature size without constant crowding. Leaves should receive suitable light, and you should be able to reach the bed without stepping on the growing soil. Water should soak into the bed without leaving prolonged standing water around most vegetable roots.
Watch plants as they grow rather than waiting until harvest. If lower leaves remain shaded or plants lean toward an open area, check whether taller neighbors block their light. If the soil dries much faster in one section, review the crop mix, soil depth, and watering pattern. These signs help you make small changes before a minor problem affects the whole bed.
Healthy growth
Plants develop in a way that matches the variety and season, with enough room for leaves and roots.
Easy care
You can reach crops, check for pests, and harvest without damaging neighboring plants.
Balanced moisture
The bed drains well and can be watered to meet the needs of its crops.
Frequently Asked Questions
Q
What is the best layout for a raised garden bed?
The best layout depends on bed size, sunlight, climate, and the crops you want to grow. Place tall crops where they are least likely to shade shorter plants, group crops with similar care needs, and follow recommended spacing. A 4-by-4-foot bed can be a useful starting point for a small vegetable garden, but the plant count must fit the chosen varieties.
Q
Which direction should raised garden beds face?
A north-south orientation can help many rows receive fairly even sunlight during the day. However, the best direction also depends on nearby trees, walls, buildings, slope, and the shape of your yard. Observe the actual sunlight before choosing the final position.
Q
How many plants can fit in a 4-by-4-foot garden bed?
A 4-by-4-foot bed has 16 square feet of growing space, but there is no single plant count that fits every crop. Small radishes and some greens can grow closer together than tomatoes or squash. Use seed packet or plant label spacing, allow for mature size, and keep enough room to reach and care for each plant.
Q
Should tall plants go at the back of a garden bed?
Tall plants often belong on the north side of a bed in the Northern Hemisphere because this can reduce shade on shorter plants to the south. If your bed receives light from an unusual direction or sits beside a wall, adjust the plan to match the real sun pattern.
Q
Can I grow flowers and vegetables in the same bed?
Yes. Suitable flowers can add color and may attract pollinators or beneficial insects. Choose varieties that fit the bed and do not crowd vegetables or block their light. Check mature size and local growing guidance before adding flowers around the edges.
Q
How often should I change my garden bed layout?
Review your layout after every growing season and change it when crop needs, shade, pests, or space problems call for it. Rotate related crop families between beds when possible. Keep notes about planting dates, growth, harvests, and disease so you can improve the next plan.
✦ Wrapping Up
Conclusion
A useful garden bed plant layout begins with a few simple checks. Measure your space, learn how much sun it gets, and choose crops that suit your climate and soil. Place tall plants with care, give each crop enough room, and group plants that need similar water and care. These choices help you make better use of every bed.
You do not need to create a complex diagram to get started. A clear sketch, a short crop list, and the spacing directions on your seed packets are enough for a practical first plan. Watch how your plants grow, record what works, and adjust the layout after harvest. Over time, those small changes can make your garden easier to tend and more productive.
💡 Key Takeaway
Measure your bed today and draw a simple planting map. Mark the north side, record sunlight, place the tallest crops first, and fill the remaining space with plants that fit their recommended spacing and growing needs.